Branding Customization
You can implement your branding across your website in the following areas:
Divi Theme Options:
- Set color palette ( to show up in Divi Builder color picker for ease of use)
Divi Theme Customizer:
- Site Identity: Favicon, Headline, Site Title
- Typography: Default Fonts, Default Font Sizes/Spacing/Line Height, Default Font Colors, Default Hyperlink Color
- Buttons: Default Button Styles (can also be set in Styling Guide)
- Home Page: Set Home Page and Blog Posts Page (optional) here
Rejuve Styling Guide (page):
You can set your branding settings in each of the following modules and also set additional text settings not found in the theme customizer in the Rejuve Styling Guide.
You can alternatively choose to set your branding using find & replace on each page to set your branding.
- Additional Text Styles (H1, H2, H3, H4, Ordered List, Body, Additional Presets)
- Modules: Button, Blurb, Email Opt-In, Contact Form, Call To Action, Toggle, Divider, Accordion, Blog Feed
Step 5: Set Default Color Palette
Set your default color picker palette in the Divi Theme Options
To Get Started:
- In Your WordPress Dashboard, scroll down to Divi > Theme Options.
You are now ready to follow the steps below.
Step 1- Color Palette Picker
1-1 Implementing Site Identity

- In Theme Options > Color Picker Default Palette> set each color> colors will show up as default colors in the color picker palette
Scroll down and click save to save changes
Step 6: Divi Theme Customizer Instructions
Set your Branding Styles for Fonts, Font Color, Buttons, Set Home Page, and More
To Get Started:
- In Your WordPress Dashboard, scroll down to Divi > Click Theme Customizer.
You are now ready to follow the steps below.
Video Tutorial For Divi Theme Customizer:
Implement your Favicon, Site Title, Font Selections, Buttons, and More
Step 1- General Settings
1-1 Implementing Site Identity
- In Theme Customizer click > General Settings > Site Identity
- Change Site Title to your Business Name
- Change Tag Line to your business tag line or slogan
- Click “change image” under Site Icon > upload your Site Icon (also known as a Favicon, this image should be 512 x 512 and is the image that shows up in the tab of your browser
- Click the < arrow at the top to be taken back to settings
1-2 Layout Settings
- To change accent color to your main branding color, under General Settings click > Layout Settings > Theme Accent Color > input your accent color RGB code
- Click the < arrow at the top to be taken back to settings
1-3 Home Page Settings
Scroll down to Home Page Settings and select the page you’d like to be your home page
Step 2- Typography (Fonts) & Font Colors
While still in the Theme Customizer, click Typography.
2-1 Changing Font Size & Font
- Under Typography, click > Body Size and adjust slider to change body text size. If you’d like to set the line height (space between each line, Click to adjust Body Line Height
- Click Header Text Size > adjust slider to change Header text size to your preferred sizing. To adjust Header Spacing (space between letters in Headings), adjust that sizing with slider. To adjust Header Line Height, Click to adjust.
- Click Header Font > select desired font to change to your desired Heading Font
- Click Body Font > select desired font to change to your desired paragraph/body font
Some body font sizes are set to larger sizing (18pt) on Home & Services pages and will not adjust with the default sizer. If you choose, you can adjust the sizing to these modules with instructions found on “Home Page” and “Service Page”.
2-2 Changing Font Color
- Click the body link color > input your rgb code for your desired hyperlink text color. This will apply to all hyperlinks within text in your site.
- Click Body Text Color > input your rgb code for your desired body/paragraph text color. This will apply to all default body text on your site.
- Click Header Text Color > input your rgb code for your desired Heading text color. This will apply to all default headingtext on your site.
Click the < arrow at the top to be taken back to General Settings and click < to be taken back to the main theme customizer dashboard.
Step 3- Button Styles
3-1 Buttons General Style
While in the Theme Customizer, click Buttons Tab
- Click Button Style > adjust text size to desired size > change text color to desired color.
- Click background color to change background color of button.
- Click border width to increase or decrease button border size. C
- Click border color to change color of border.
- Click border radius and increase size for more rounded border or decrease for more squared border.
- Click letter spacing to adjust spacing between button letters.
- Click Button Font to change to desired Font
- Click Add Button Icon to add a default icon to button > icon color to change icon color > icon placement to show on left or right > icon hover to determine if icon shows always or on hover.
Click the < arrow at the top to be taken back to Button Settings.
3-2 To Change the Button Style on Hover
- In Buttons Settings click > Button Hove Style
- Click text color to adjust text color on hover
- Click Background color to adjust background color on hover
- Click border color to adjust border color on hover
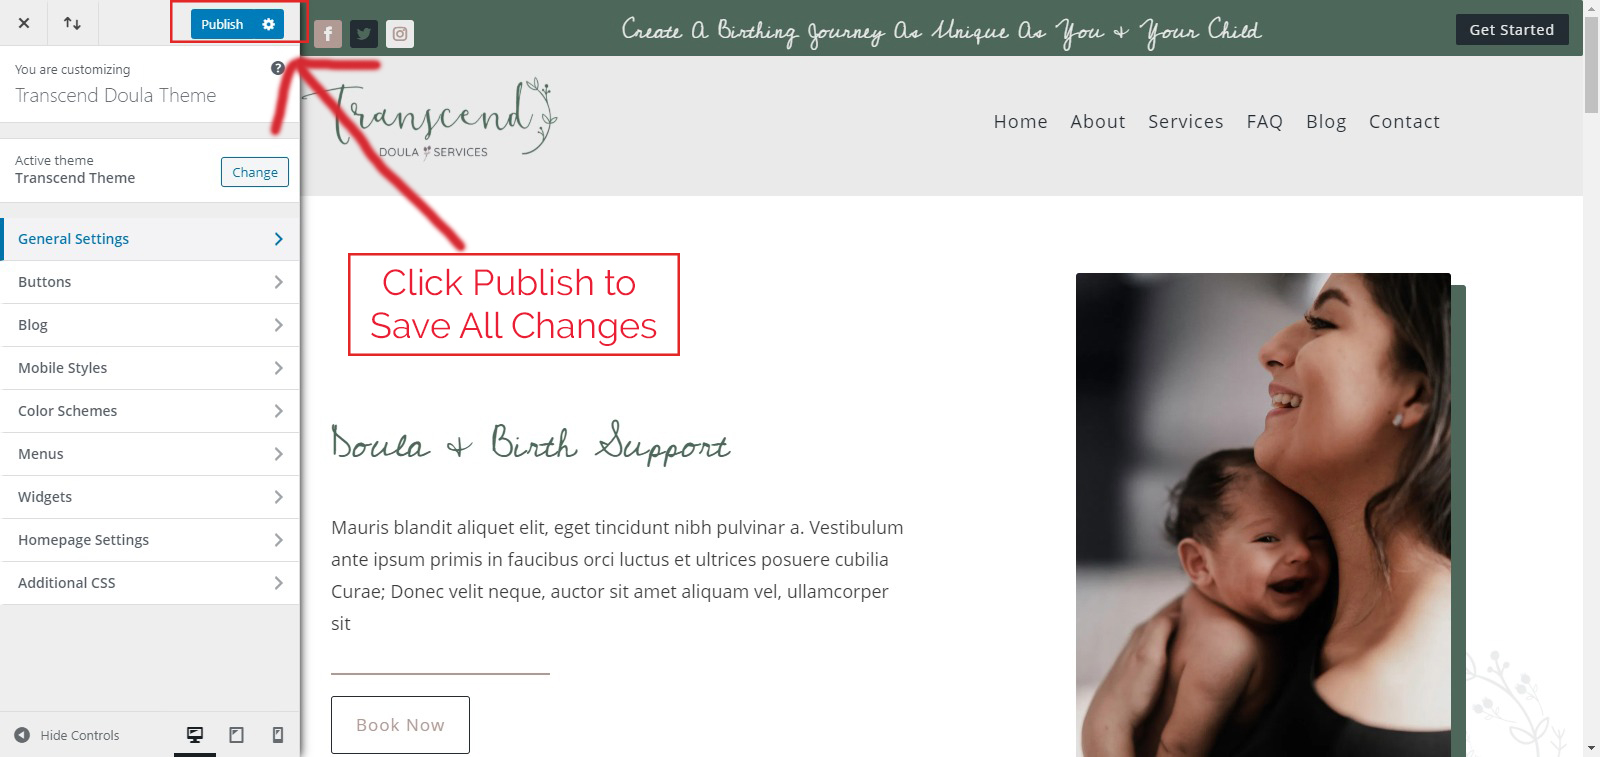
Click the < arrow at the top to be taken back to Button Settings and Click Publish once back in the Theme Customizer Dashboard.
To Save Changes Once Complete With All Steps Above
or
To Save and Come Back at A Later Time:
- Click “Publish” button to save and click “x” to exit.
Rejuve Styling Guide Instructions
To implement YOUR branding styles across the website kit, you can make changes to the modules all in one place. These changes will automatically reflect across your entire website.
You can alternatively choose to make the changes to the modules on each page.
Video Tutorial For Rejuve Styling Guide:
Global Presets
Typography (Fonts) & Font Colors
While in the Styling Guide Page (located in Divi Library)
2-1 Changing Font Size & Font in Global Presets (changes will reflect across entire website once you save them here).
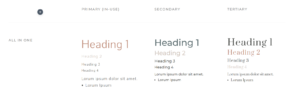
Find Section 02- Text Styles
Locate Primary (In Use) ALL IN ONE section
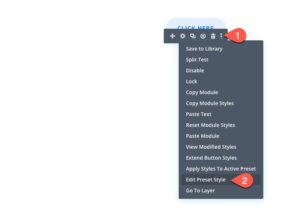
Hover over module until grey bar appears > click 3 white dots in far right hand corner of grey box > click “Edit Preset Style” > Click Design Tab
Body (Paragraph Font)
- Click Text > Click Text Font > select desired font to change to your desired paragraph/body font > Click Desired Font Weight (bold, light, etc) > Click desired Font Style > Select or input desired Font Color > select desired Text size > select desired text letter spacing > select desired text line height > select desired alignment and text shadow > stay in design Tab
List Style (Bullet text)

While still in the Text tab> Click over to the bullet icon named Unordered List (located at the very top of the Text Settings at top of Design Tab > select desired font to change to your desired paragraph/body font > Click Desired Font Weight (bold, light, etc) > Click desired Font Style > Select or input desired Font Color > select desired Text size > select desired text letter spacing > select desired text line height > select desired alignment and text shadow > stay in design Tab
Heading Font
- Click Header > Heaings 1-4 are set here. You need to click each Tab (H1, H2, H3, H4) to make desired changes to each Header text size
- Click Header Font > select desired font to change to your Header font > Click Desired Font Weight (bold, light, etc) > Click desired Font Style > Select or input desired Font Color > select desired Header size > select desired text letter spacing > select desired text line height > select desired alignment and text shadow
Once you’ve made all the desired changes to the default Text preset, click the green checkmark to save, you will click the green checkmark again to exit the preset module. All changes will be reflected across your website for the primary text modules.
Some modules are not set in the primary text module. I will go over those text modules in the specific pages.
To implement your branding in the modules across your entire website:
Scroll down to Section O4- Modules

Click To View Primary Module Style Legend

To implement your branding for modules (see primary module style legend above to be sure you’re making the changes in the right area), please hover over module until grey bar appears > click 3 white dots in far right hand corner of grey box > click “Edit Preset Style” > Click Design Tab
Blurb Styles
4-1 Blurb Style
While in the Style Guide, Hover over the Primary Blurb, click 3 white dots in far right corner pf grey box > click “edit preset style”> click design tab
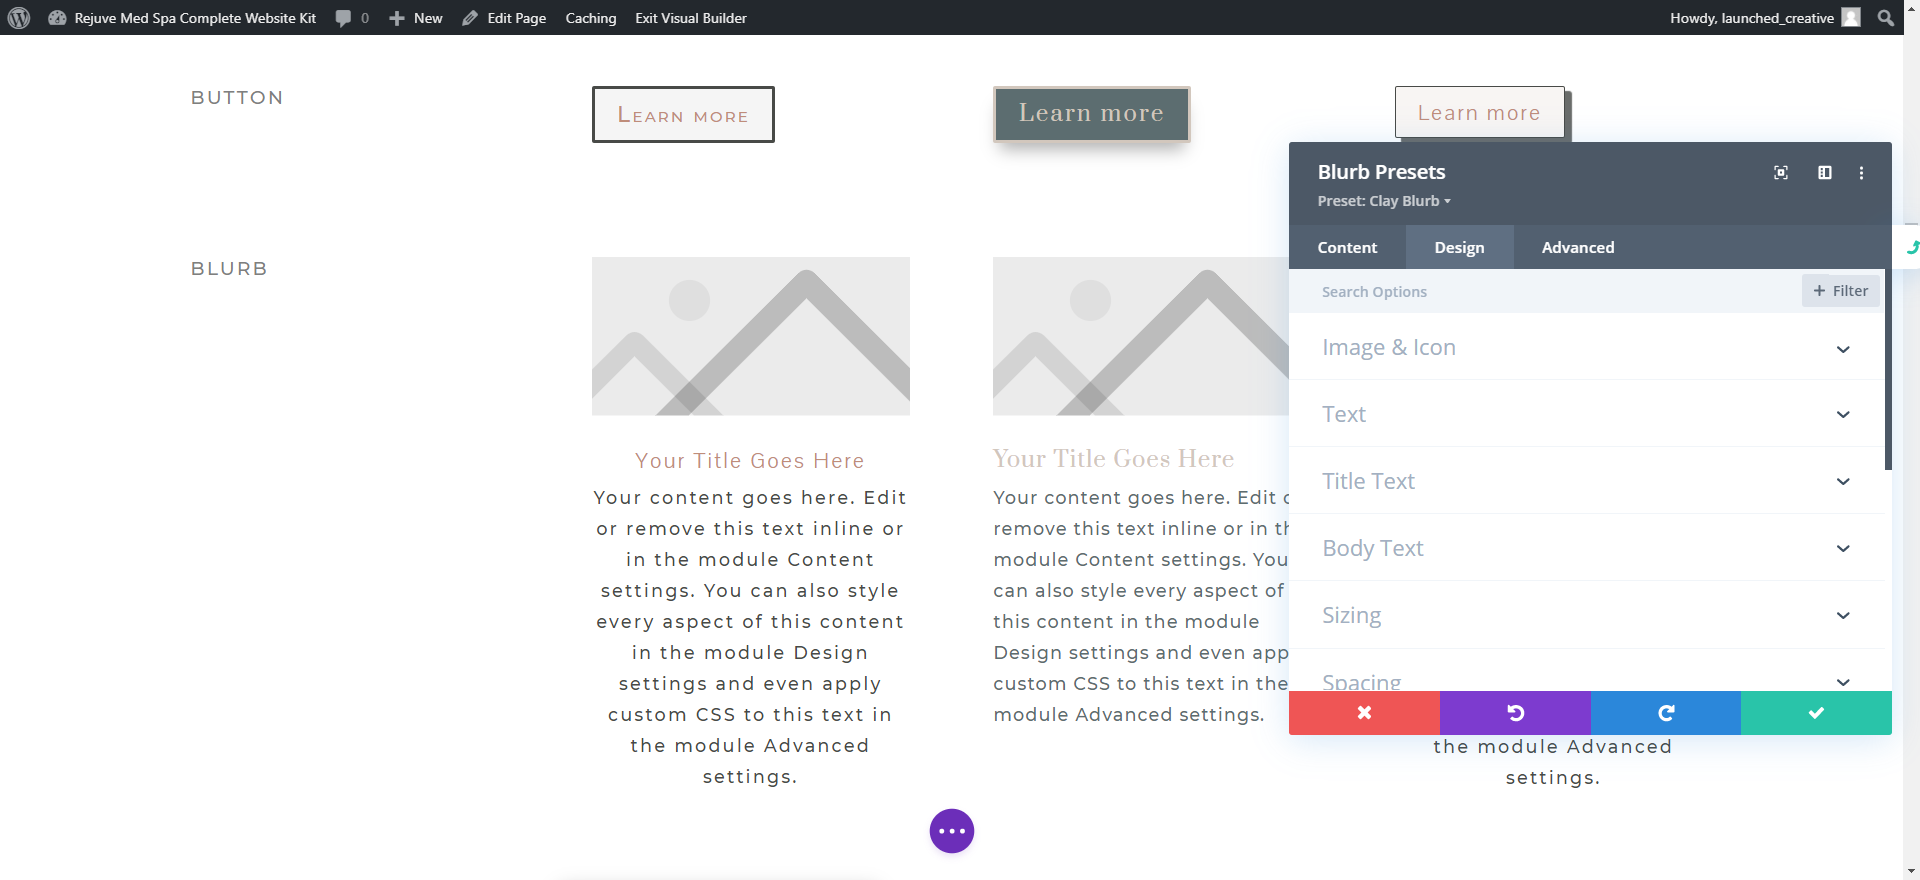
- Click Image & Icon to adjust icon color, placement, alignment, image border width, etc > adjust text size to desired size > change text color to desired color.
- Click Text, Title Text, and Body Text to adjust font sizing, color, spacing, etc for each font type.
- Click border width to increase or decrease button border size.
- Click border color to change color of border.
- Click border radius and increase size for more rounded border or decrease for more squared border.
- Click Box Shadow to add a shadow to box
Click green checkmark to save, click green checkmark again to save sitewide.
Email Opt-In
While in the Style Guide, Hover over the Primary Email Opt-In, click 3 white dots in far right corner of grey box > click “edit preset style”
5-2-A Email Opt-In Style
Whilestill in the Primary Email Opt-In, click “design” tab to set styles for this form

- Click Layout to change field sizes for First Name, Last Name, and Email
- Click Fields to change the input fields background color, focus color, text color, font style and more.
- Click Title Text to change the font, text style, and color of the Title
- Click Body Text to change the font, text style, and color of the body
- Click Result Message Text to change the font, text style, and color of the result message
- Click Button to change the style of the subscribe button
- Click border width to increase or decrease button border size.
- Click border color to change color of border.
- Click border radius and increase size for more rounded border or decrease for more squared border.
- Click Box Shadow to add a shadow to box
5-2-B Change background color of module
- Under the “content” tab, scroll down to “background”, resent background color to desired color
All content settings can be changed on the home page of the Rejuve kit in the opt-form.
Click green checkmark to save, click green checkmark again to save sitewide.
Contact Form
6-1 Contact Form Styles
While in the Style Guide, Hover over the Contact Form, click 3 white dots in far right corner pf grey box > click “edit preset style”> click design tab
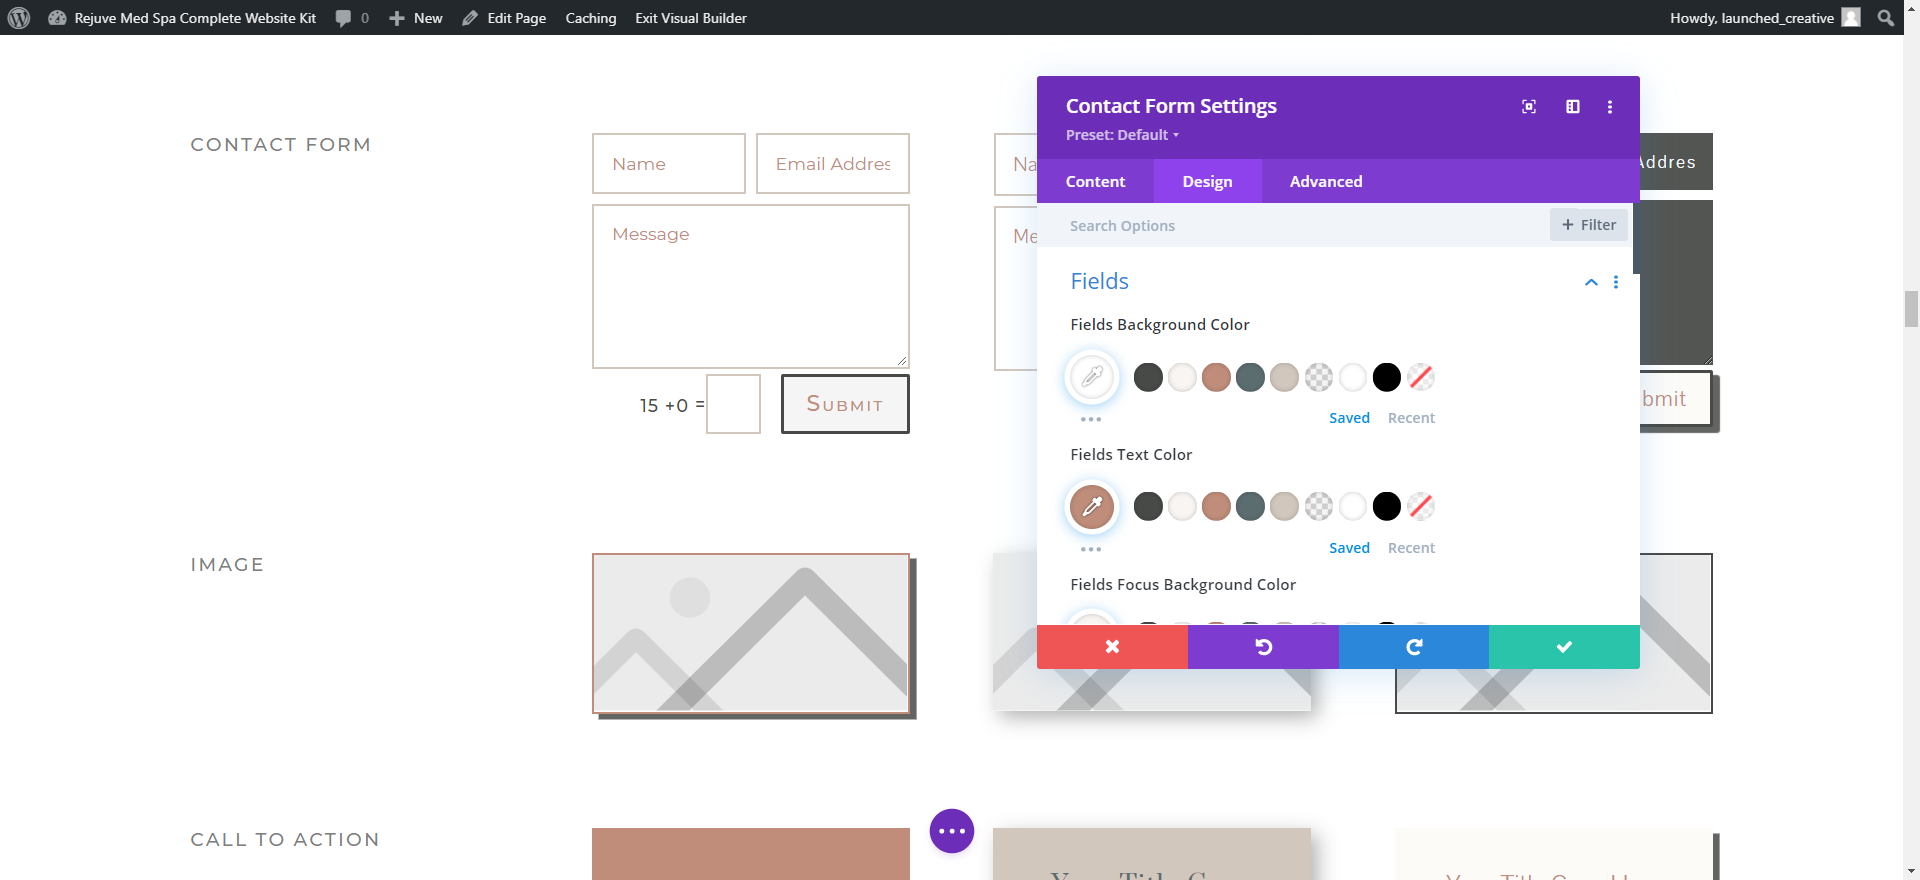
- Click fields > change colors to desired colors > change font styles to desired fonts/size/colors > change
- Scroll down to “capctha text” to change captcha text styles (the math problem text styles)
- Click “button” to change submit button styles
- Click border width to increase or decrease button border size.
- Click border color to change color of border.
- Click border radius and increase size for more rounded border or decrease for more squared border.
- Click Box Shadow to add a shadow to box
Click green checkmark to save, click green checkmark again to save sitewide.
Call To Action
Call To Action Styles
While in the Style Guide, Hover over the Call To Action, click 3 white dots in far right corner pf grey box > click “edit preset style”> click design tab

- Click Title Text> change colors to desired colors > change font styles to desired fonts/size/colors > change
- Scroll down to “Body Text” to change Body text styles
- Click “button” to change button styles
- Click border width to increase or decrease button border size.
- Click border color to change color of border.
- Click border radius and increase size for more rounded border or decrease for more squared border.
- Click Box Shadow to add a shadow to box
7-2 To change Background color of module:
- Click “content” tab, scroll down to background > update background colot to desire background
Click green checkmark to save, click green checkmark again to save sitewide.
Toggle
8-1 Toggle Styles
While in the Style Guide, Hover over the Toggle, click 3 white dots in far right corner pf grey box > click “edit preset style”> click design tab

- Click Icon > change color/size of toggle icon
- Click Toggle to change toggle background colors
- Click Title Text> change colors to desired colors for OPEN and CLOSED state > change font styles to desired fonts/size/colors > change
- Click Closed Title Text to set color for Title color when closed
- Scroll down to “Body Text” to change Body text styles
- Click border width to increase or decrease button border size.
- Click border color to change color of border.
- Click border radius and increase size for more rounded border or decrease for more squared border.
- Click Box Shadow to add a shadow to box
Click green checkmark to save, click green checkmark again to save sitewide.
Accordion
Accordion Styles
*Accordion is just like Toggle module, except the toggles slide up and down when they open like an accordion
While in the Style Guide, Hover over the Accordion, click 3 white dots in far right corner pf grey box > click “edit preset style”> click design tab
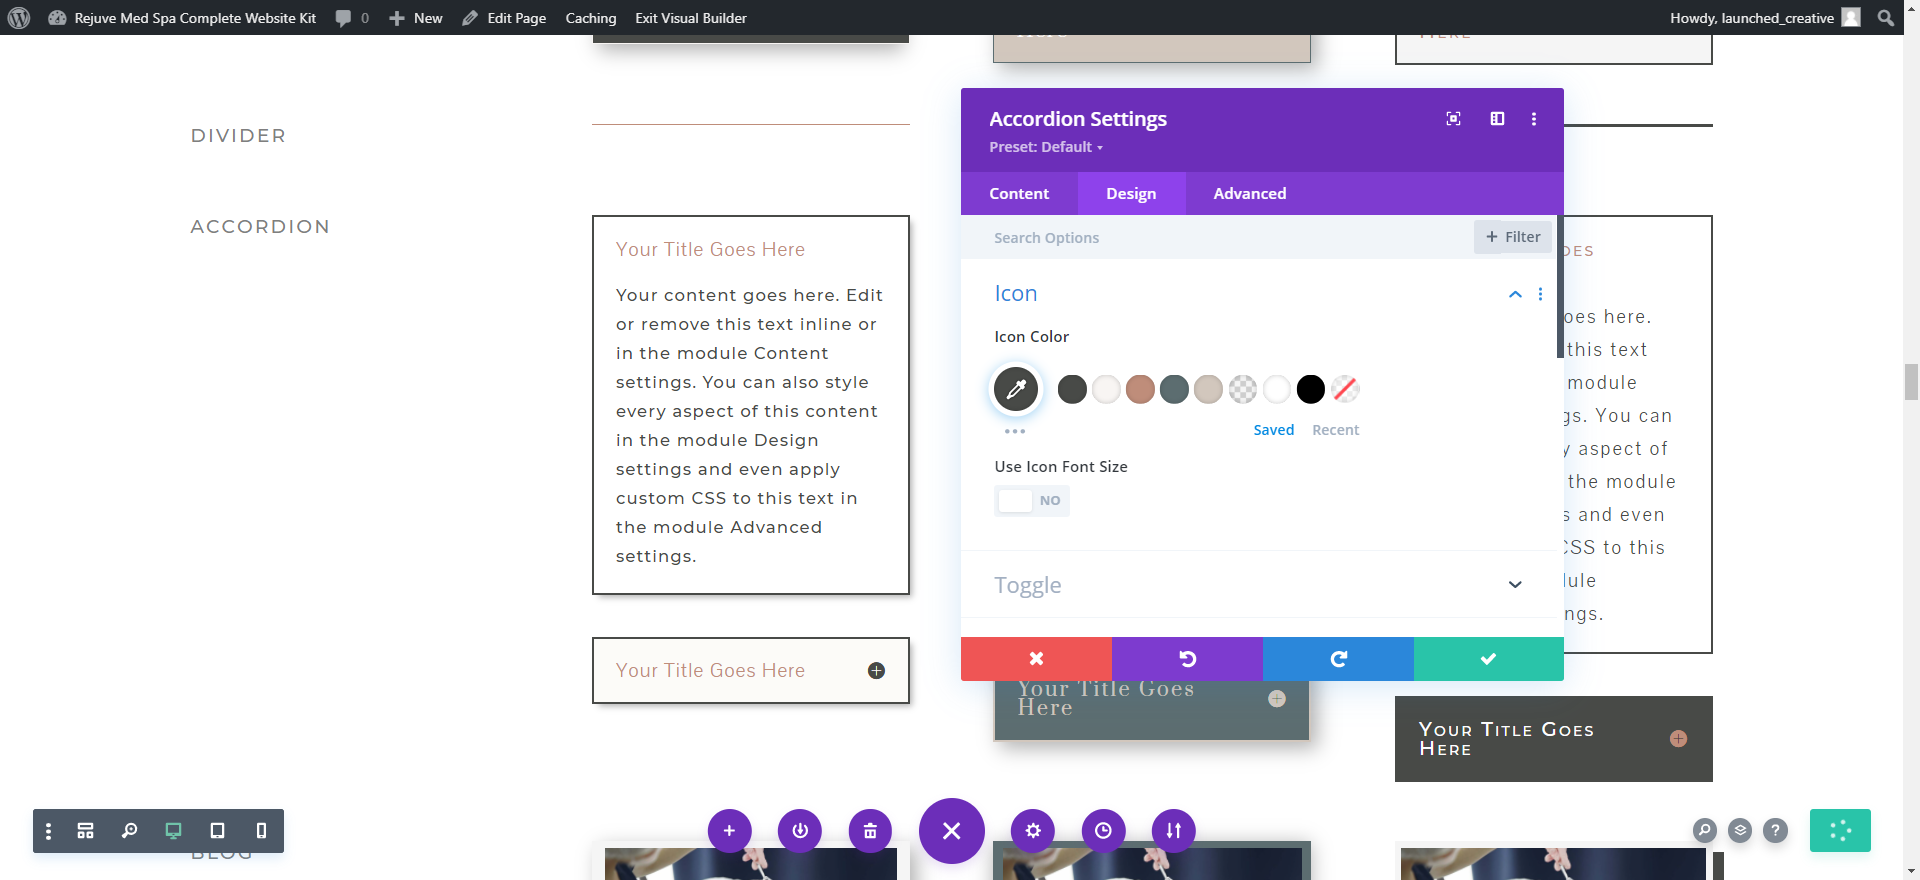
- Click Icon > change color/size of toggle icon
- Click Toggle to change toggle background colors
- Click Title Text> change colors to desired colors for OPEN and CLOSED state > change font styles to desired fonts/size/colors > change
- Click Closed Title Text to set color for Title color when closed
- Scroll down to “Body Text” to change Body text styles
- Click border width to increase or decrease button border size.
- Click border color to change color of border.
- Click border radius and increase size for more rounded border or decrease for more squared border.
- Click Box Shadow to add a shadow to box
Click green checkmark to save, click green checkmark again to save sitewide.
Divider
9-1 Divider Styles
While in the Style Guide, Hover over the Divider, click 3 white dots in far right corner pf grey box > click “edit preset style”> click design tab
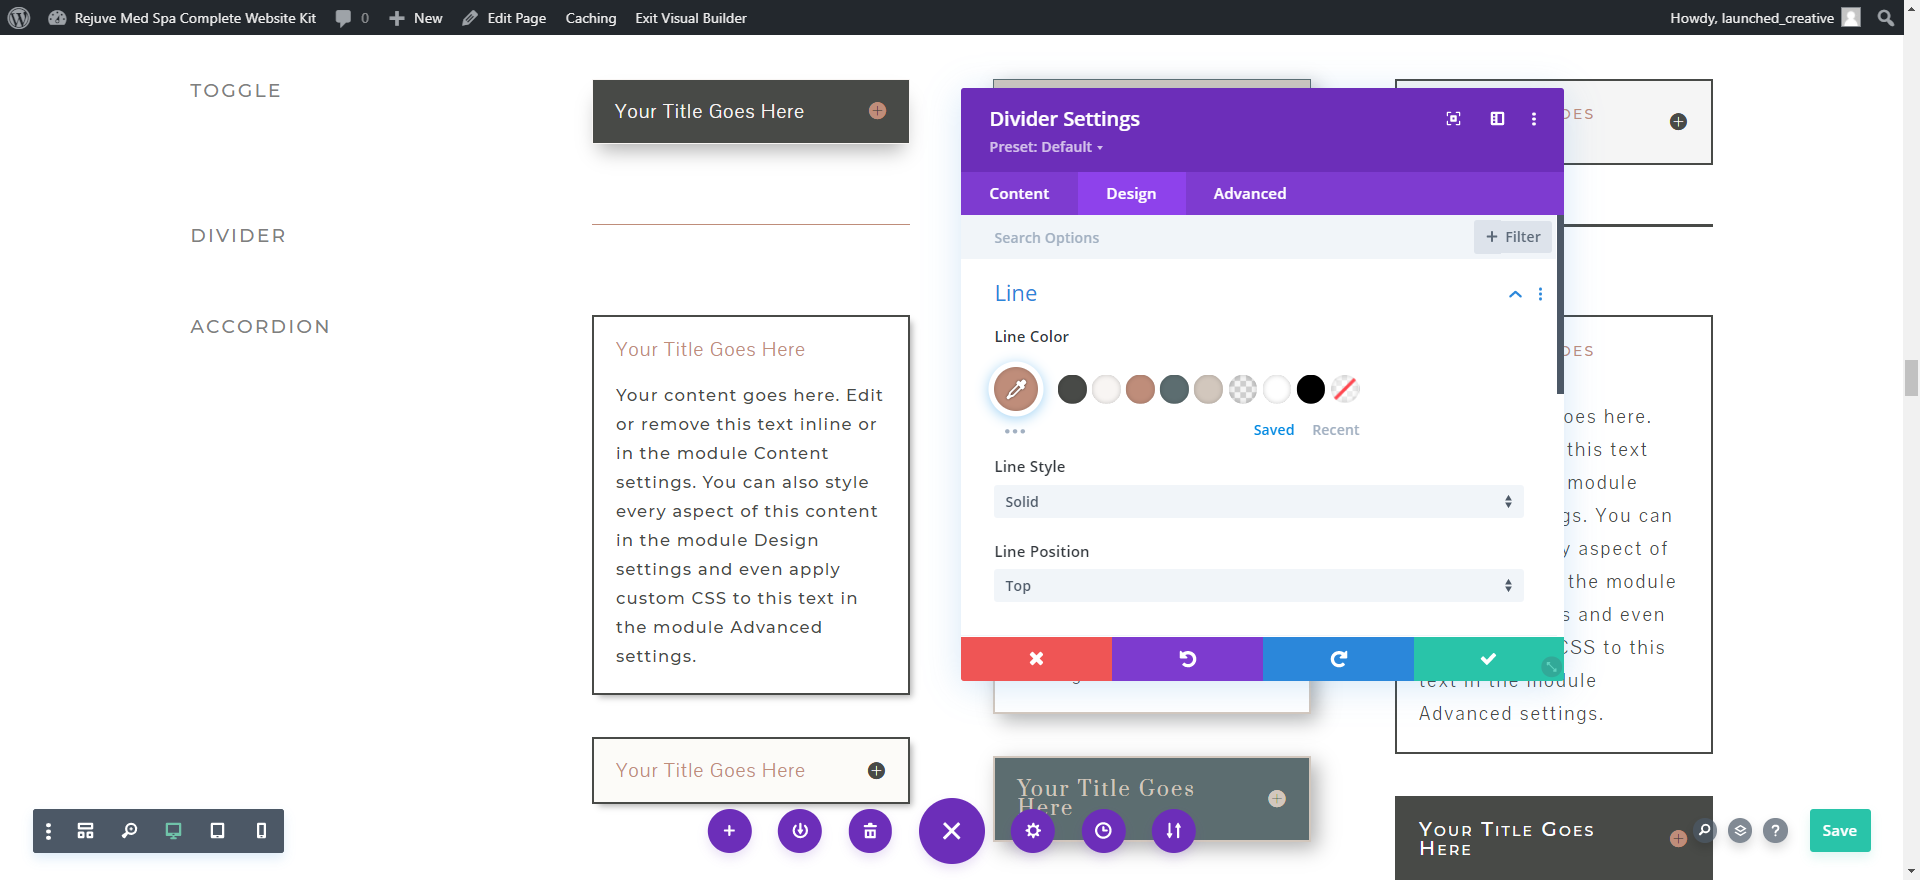
- Click Line Color> change color
- Click Line Style to change line style
- Click Line Position to change position
- Click Sizing to adjust line size, weight
- Scroll down to “Body Text” to change Body text styles
- Click border width to increase or decrease button border size.
- Click border color to change color of border.
- Click border radius and increase size for more rounded border or decrease for more squared border.
- Click Box Shadow to add a shadow to box
Click green checkmark to save, click green checkmark again to save sitewide.
Blog Feed
11-1 Blog Feed Styles
While in the Style Guide, Hover over the Blog, click 3 white dots in far right corner pf grey box > click “edit preset style”> click design tab
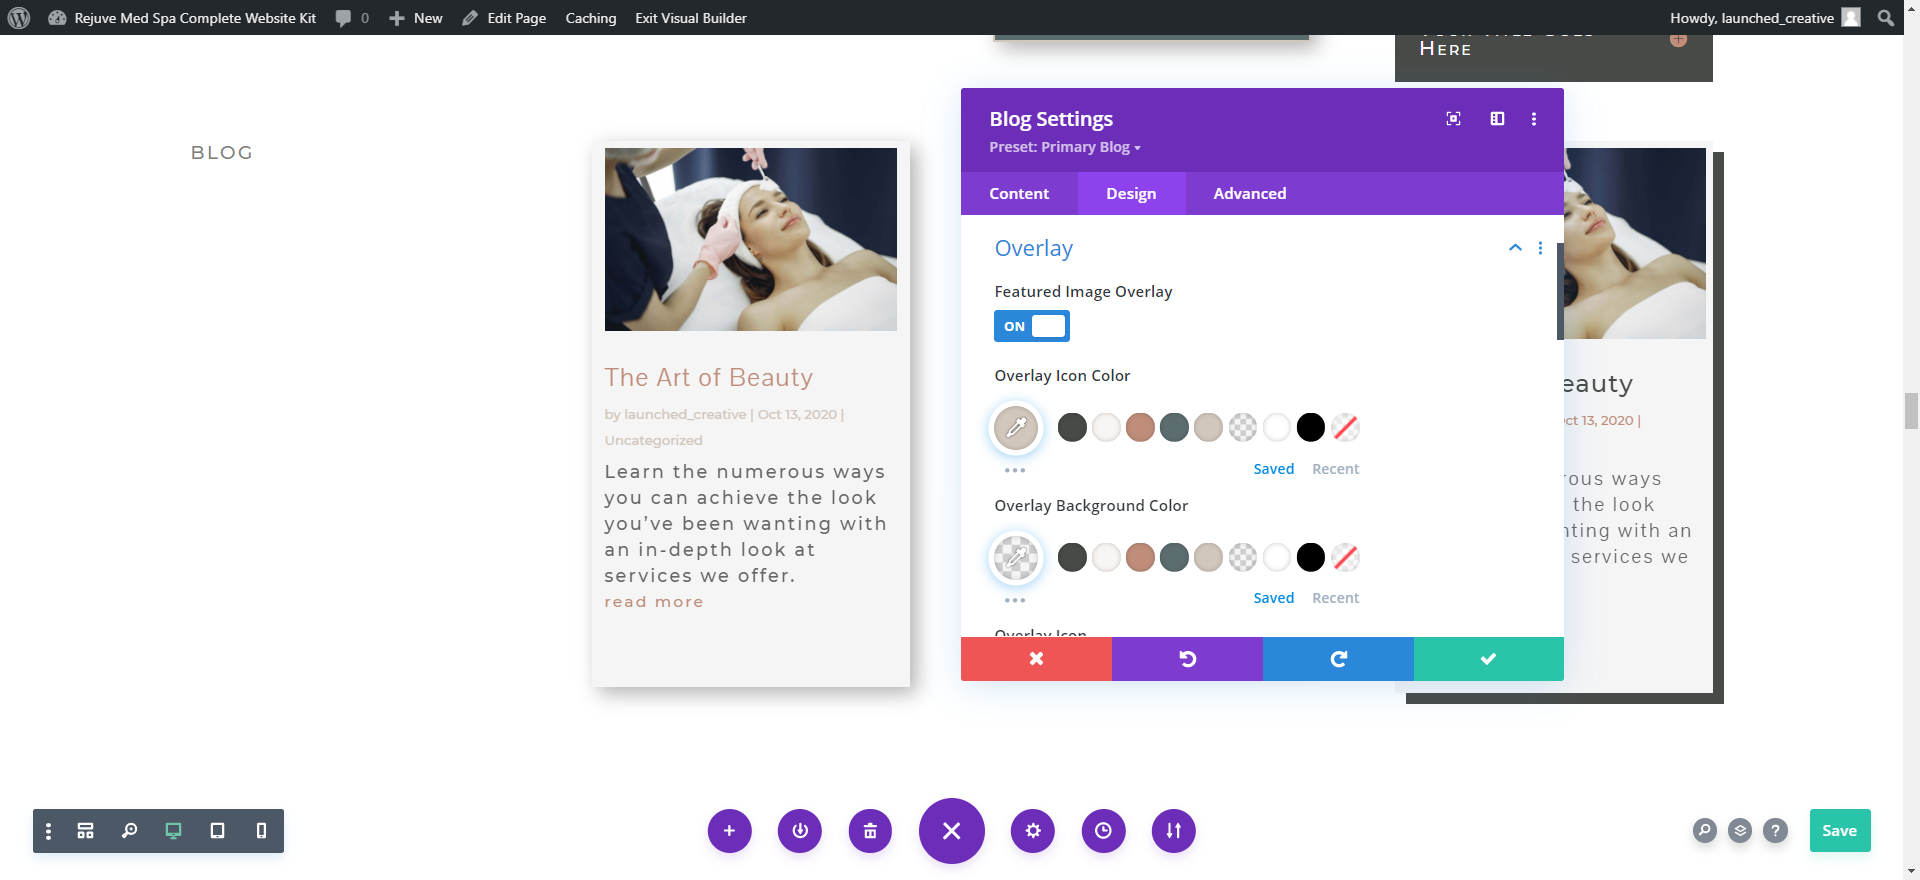
- Click “Layout” to change fromfull width to grid
- Click “overlay” to change featured image overlay styles
- Click Image to change roundness of image and add border color and size
- Click Title Text> change colors to desired colors > change font styles to desired fonts/size/colors > change
- Scroll down to “Body Text” to change Body text styles
- Click “meta text” to change the meta text styles (meta text is the post info like date, category, author, etc)
- Click “Read More Text” to change the”read more” link styles
- Click “Pagination Text” to change styles for pagination”
- Click border width to increase or decrease button border size.
- Click border color to change color of border.
- Click border radius and increase size for more rounded border or decrease for more squared border.
- Click Box Shadow to add a shadow to box
11-2 To change Background color of module:
- Click “content” tab, scroll down to background > update background colot to desire background
Click green checkmark to save, click green checkmark again to save sitewide.