Quikly & Easily Customize Pages
Divi comes with editing tools that make customization quick and easy. Click below for guides on the following Quick Customization Tools:
Bulk Edit Using MultiSelect
1- MultiSelect & Bulk Editor
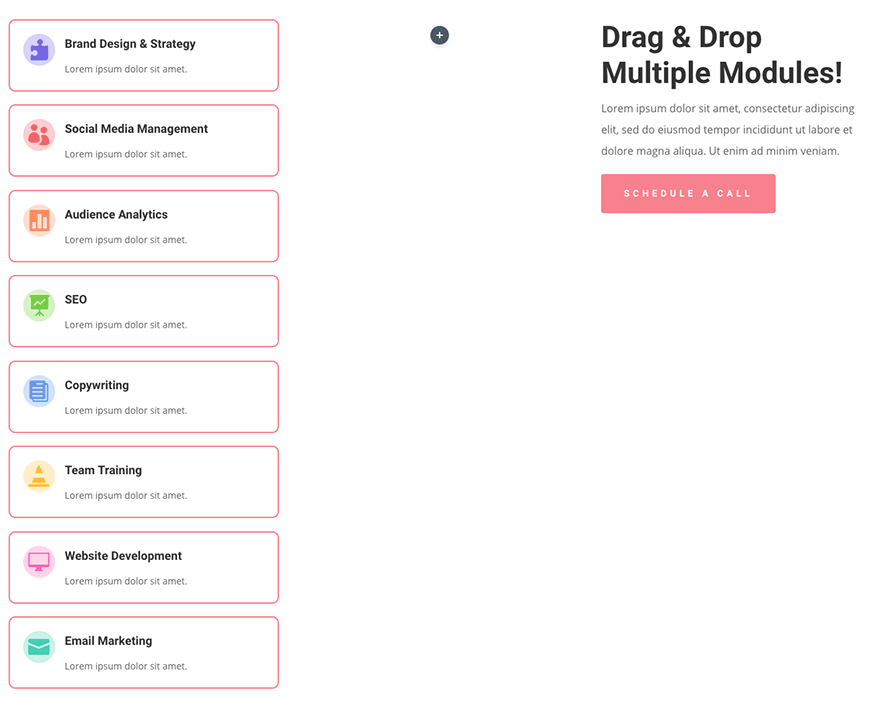
You can quickly select multiple items at the same time and perform bulk actions to the entire group of modules in Divi Builder. You can do the following of everything at the same time:
- drag and drop
- copy, paste, delete
- edit the design and content
Instead of making tedious changes to a group of elements one one by one, and over and over again, simply select them all and edit everything at once using the muliselect function.
To use, open your Visual Builder:
To bulk copy, delete, or move sections-
- hold down the Cmd or Ctrl keys
- left click on elements to select them.
- You can multiselect as many items as you want
- You can select a combination of modules, rows and sections.

- To edit the design and content of modules (like text modules, buttons, CTA, dividers, etc):
- hold down the Shift key and click to select a series of modules within a column, a series of rows within a section, or a series of sections within a page.
- Once selected, you can bulk edit the entire collection of items at once.
- It is best to select the same types of modules at once to make the changes to styles and design, as each module type has its own set of design features.
- ex: Hold down shift key and left click the series of text boxes you’d like to adjust the colors, design, borders, etc for.
- Once you’ve made your changes, simply click any blank area on your website page to exit the multiselect function.
Note:
Holding down the Cmd or Ctrl keys is also a great way to better understand the structure of your page, and to quickly select small individual modules.
When you hold down Cmd or Ctrl, you get a clear outline of all modules, rows and sections, giving you a perfect picture of your entire page and how all the individual pieces fit together.
To view comprehensive documentation on the Divi Bulk Editing, click here
Global Presets
*Not available in Spectrum Complete Website Kit and Transcend Complete Website Kit
2-1 All About Global Presets
What is a Preset:
Global Presets allow multiple defaults called “presets” to be used for any element in Divi. It allows you to make changes and implement your branding sitewide to specific modules. Speed up the customization process of your website kit both on a local and global scale.
Example: Default Button Style preset set as “Main Button Style” can be changed on the style guide or anywhere within any page on your website. Once you update the style of the preset to match your styling on that one button preset, it will change ALL buttons set to that preset automatically sitewide, saving you loads of time.
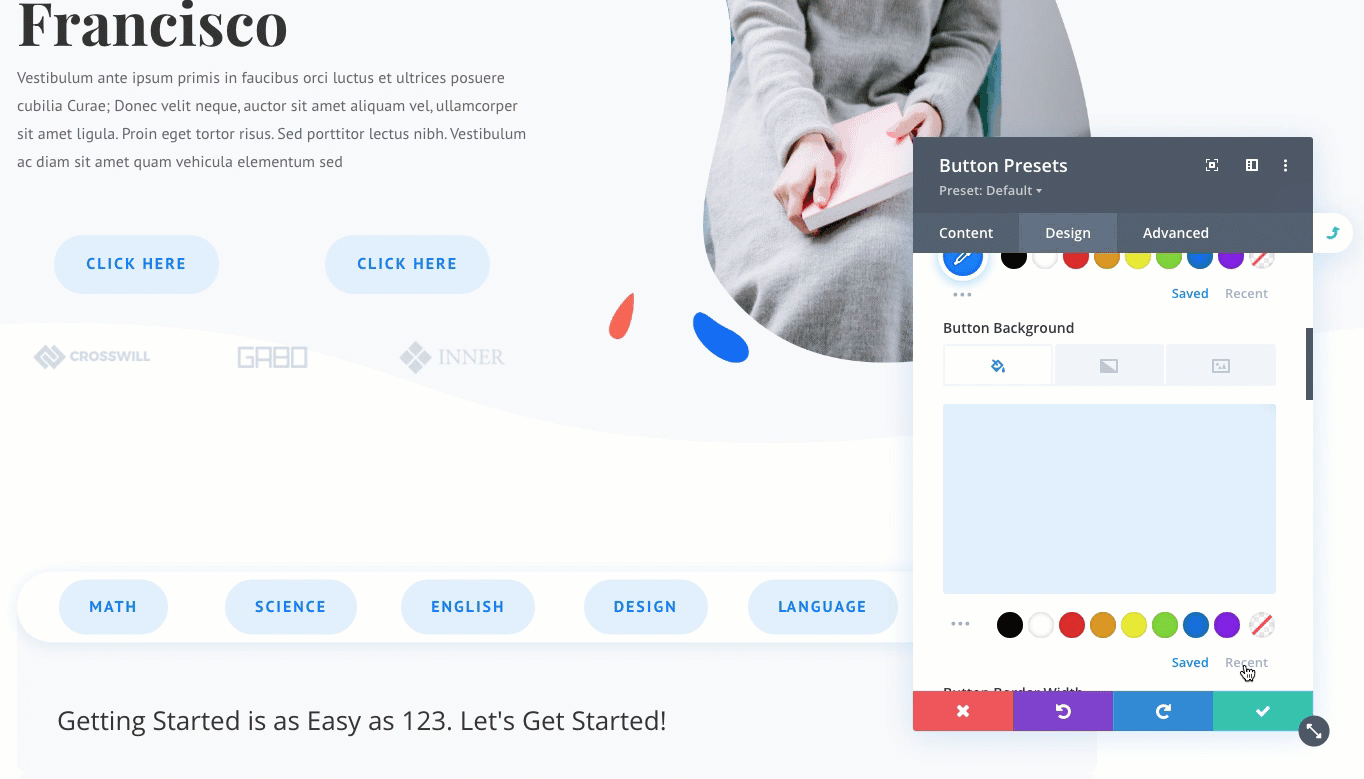
Pre-styled Presets for your Complete Website Kit are found in their respective modules. To access the preset and make chanfes, you click the 3 white dots in the corner of the module, or click the pencil button in the “Preset:____” area.
This Global Preset Setting Modal will have a gray header to make it easy to determine that you are editing global preset options, rather than options that only apply to the element locally.


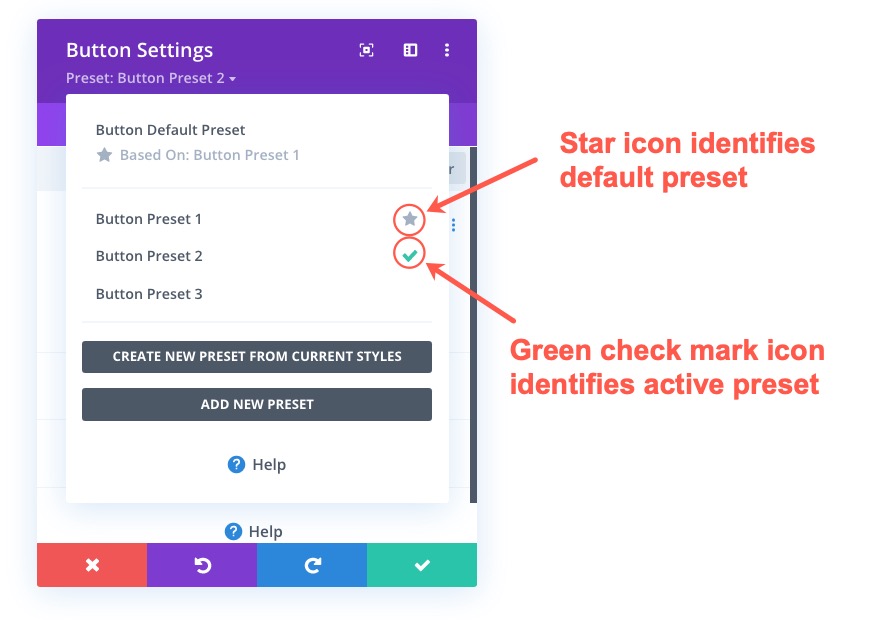
“Star” and “Checkmark” Icons:
Next to certain presets in the list, you will notice a star icon and a check icon. The star icon identifies the preset that is being used as the default preset. The green checkmark icon identifies the active preset (or the preset currently being used by the element).
To speed up customization, it is a great idea to update the preset for each module in the Style Guide or on the pages within your website kit. Once you have the Preset open for the module you’d like to update and have opened the global editing state (with 3 white dots in corner of module or the pencil mark edit button of the preset), make changes to the preset under the Content & Design Tab.
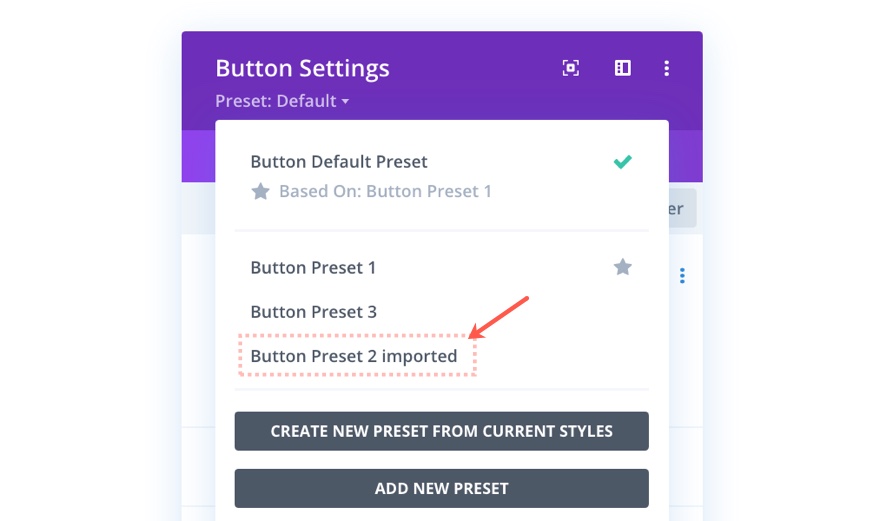
Presets included with your Complete Website Kit will have “imported” after the name of the preset. Be sure to select the preset with the “imported” label when adding a new module and applying the corresponding preset.
Once you’ve made all your design changes in a global preset, be sure to click save. You will be asked if you are sure you want to make these changes globally, click yes and click save again.

To view comprehensive documentation on the Divi Presets, click here
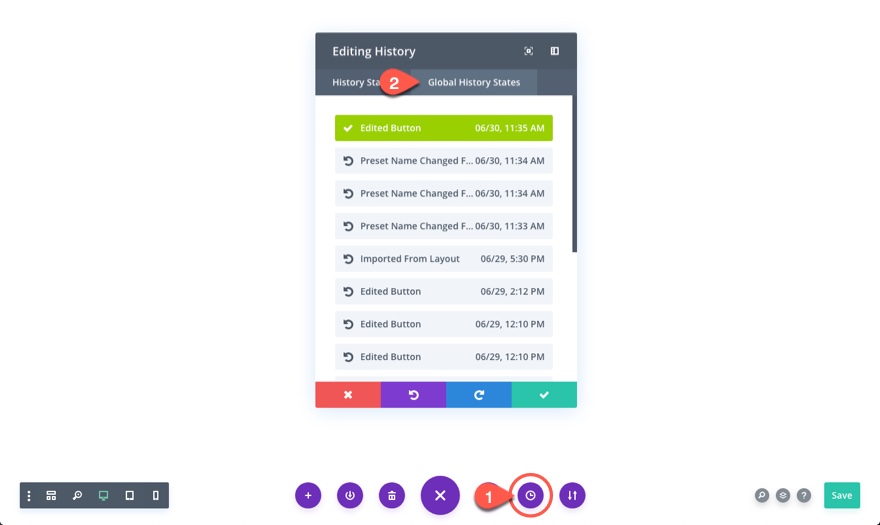
2-2 Global History (If made a mistake)
Make a mistake with presets? Don’t worry! You can control history states for site-wide changes with Global History States.
To access the editing history modal:
Click the clock icon in the settings menu > select the Global History States tab within the History modal > you will be able to select different site-wide states to undo mistakes.
*A new state will be added to the list each time you save and confirm a global preset change to a module, row, or section. All you need to do is select the state from the list to revert back to previous states.
Find & Replace
3- Find & Replace To Quickly Customize
What is Find & Replace:
Find and Replace allows you to make sweeping changes across your entire page instantly. You can change every design value within a module using Find & Replace and set the parameters to make these changes across your entire page or just within a specific module. You can change an entire page’s color scheme, fonts and more in a matter of seconds.
When you find and replace a value, you have control over the scope and location of the replacement. You can find and replace particular values within particular areas, or you can find and replace values across your entire page. You can limit replacement to particular option types, or you can replace all found values across all modules and all options.
To view comprehensive documentation on the Divi Presets, click here
Extend Styles
4- Extend Styles
What is Extend Styles:
You can change colors quickly using the “extend” feature. You can right-click on any setting in the Divi Builder and extend that value to other similar settings on the page.
-For example, if you right-click the H2 heading color and select “Extend Heading 2 Text Color” it would bring up a settings box like in the image below:
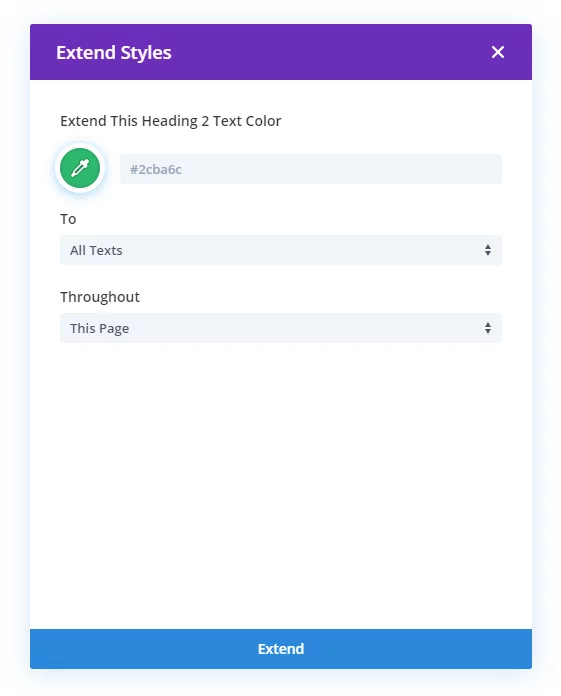
The dropdown selector gives you multiple options so you can extend the styles accordingly:
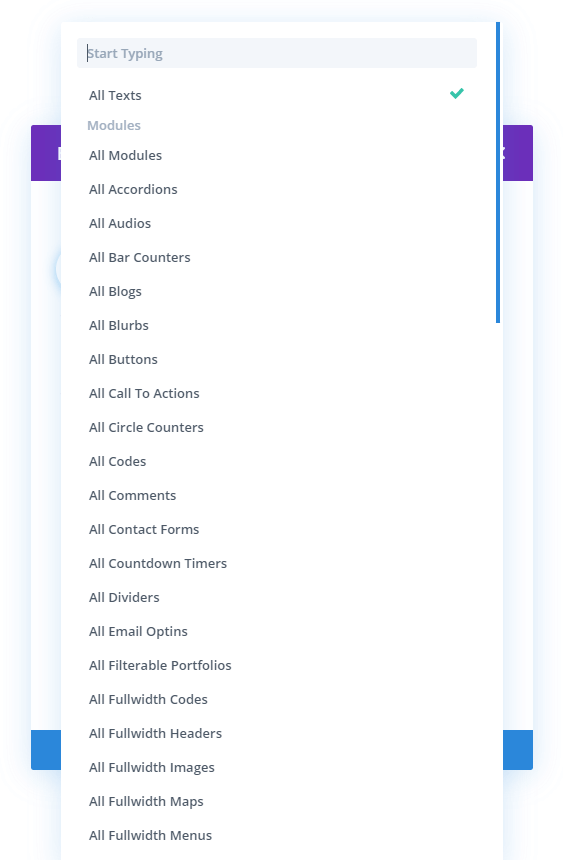
You can also select where you’d like to extend the styles throughout:
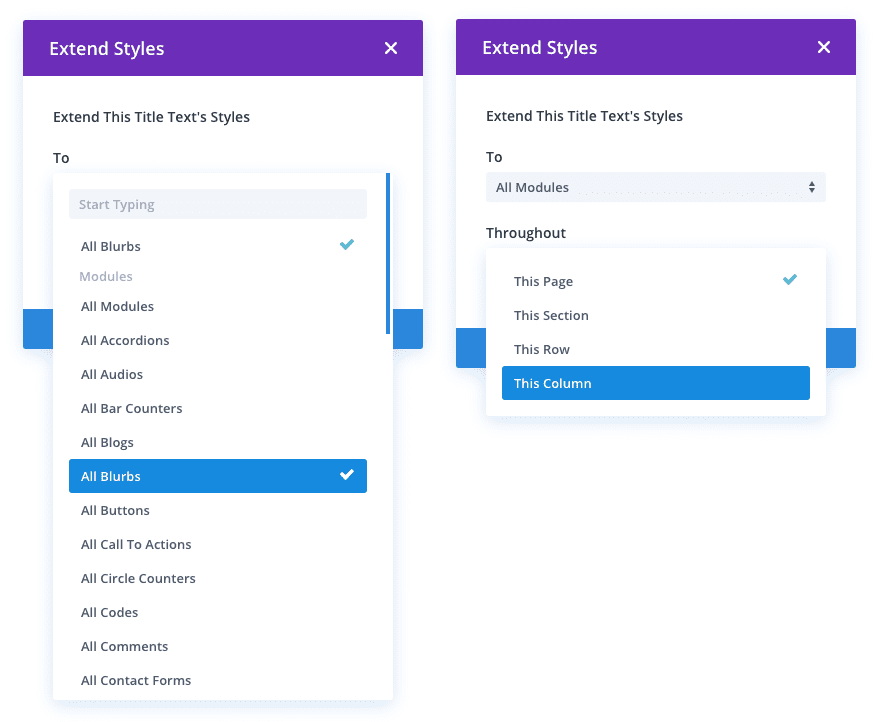
To Extend Styles in Divi, simply right click on any element, option or option group, and choose the Extend Styles option.
You can then choose where and to which elements you would like to extend the styles.
You can extend styles to specific modules within specific locations, or you can extend styles to all modules across the entire page using location and element targeting.
To futher examine the feature, you can also use a unique box shadow and border style combo on all of your page’s images. Simply right click on an image module and extend those styles across the entire page with a single click. You can even extend styles within specific and uniquely designed locations by limiting the extension to parent rows and sections.
To view comprehensive documentation on the Extend Styles feature, click here