Customize the Home Page to fit your Business Replace placeholder content & images with your own!
Follow along to see how to make these changes in the easy steps below.
To Get Started Making Home Page Changes:
Navigate To Your WordPress Dashboard > Pages > Click All Pages > Hover Over “Home” > Click “Edit With Divi” >
You are now in the Front End Builder of Your Home Page and will make all changes to home page here.
Video Tutorial:
Step 1- Changing Placeholder Text & Divider Color
1-1 Replacing Headings and Text with Your content
- Once in your home page, you will hover over each text module that you want to replace the text > click grey gear/setting icon > Content > replace the content with your text > click save
- Alternatively, you can click the text area you would like to change and start typing directly into the box > click save changes at bottom of page.
1-2 Resizing Placeholder Text
Most placeholder body text is set to the default font size of 16px. Some placeholder content is set to 18px to emphasize importance. If you would like to change these areas that are are not set to default, or to change any area you prefer to make larger:
- Hover over the text module you’d like to change > click grey settings icon > click Design Tab > text > text size > input your desired text size > click save.
- To change heading sizes, follow the steps above and scroll to > heading text to change sizing > click save.
1-3 Changing Divider Line Color
- To change divider line color, hover over the divider line > click settings icon > Design Tab > Line > Line Color > select your line color by inputting RGB color code > click save.
Step 2- Changing Placeholder Images
2-1 Changing Placeholder Images
- Hover over grey Image Module setting icon > click image > replace with your uploaded image or from your library > click save.
2-2 Changing Image Frame Color
- While still in the image module settings, click > design >scroll down to border > change border color to desired color
Step 3- Services Module Content & Links
3-1 To Changing Out Placeholder Content
- In the Services Section on your Home Page, hover over the green row sections to change background colors (there are 2 rows for this section)
- To change the services styling using multi-select bulk editing: Hold down CTRL button and left click each box in the services section of the home page until all the service boxes are highlighted

- Once you’ve selected all the service menu boxes, click the grey gear settings icon > click the content tab > scroll down to background > select background color for desktop mode, adjust transparency as desired > click the arrow next to the desktop icon to select the hover background color > click back on the desktop icon to change views back to desktop or leave on hover.
Desktop View To Change Main Background Cover Overlay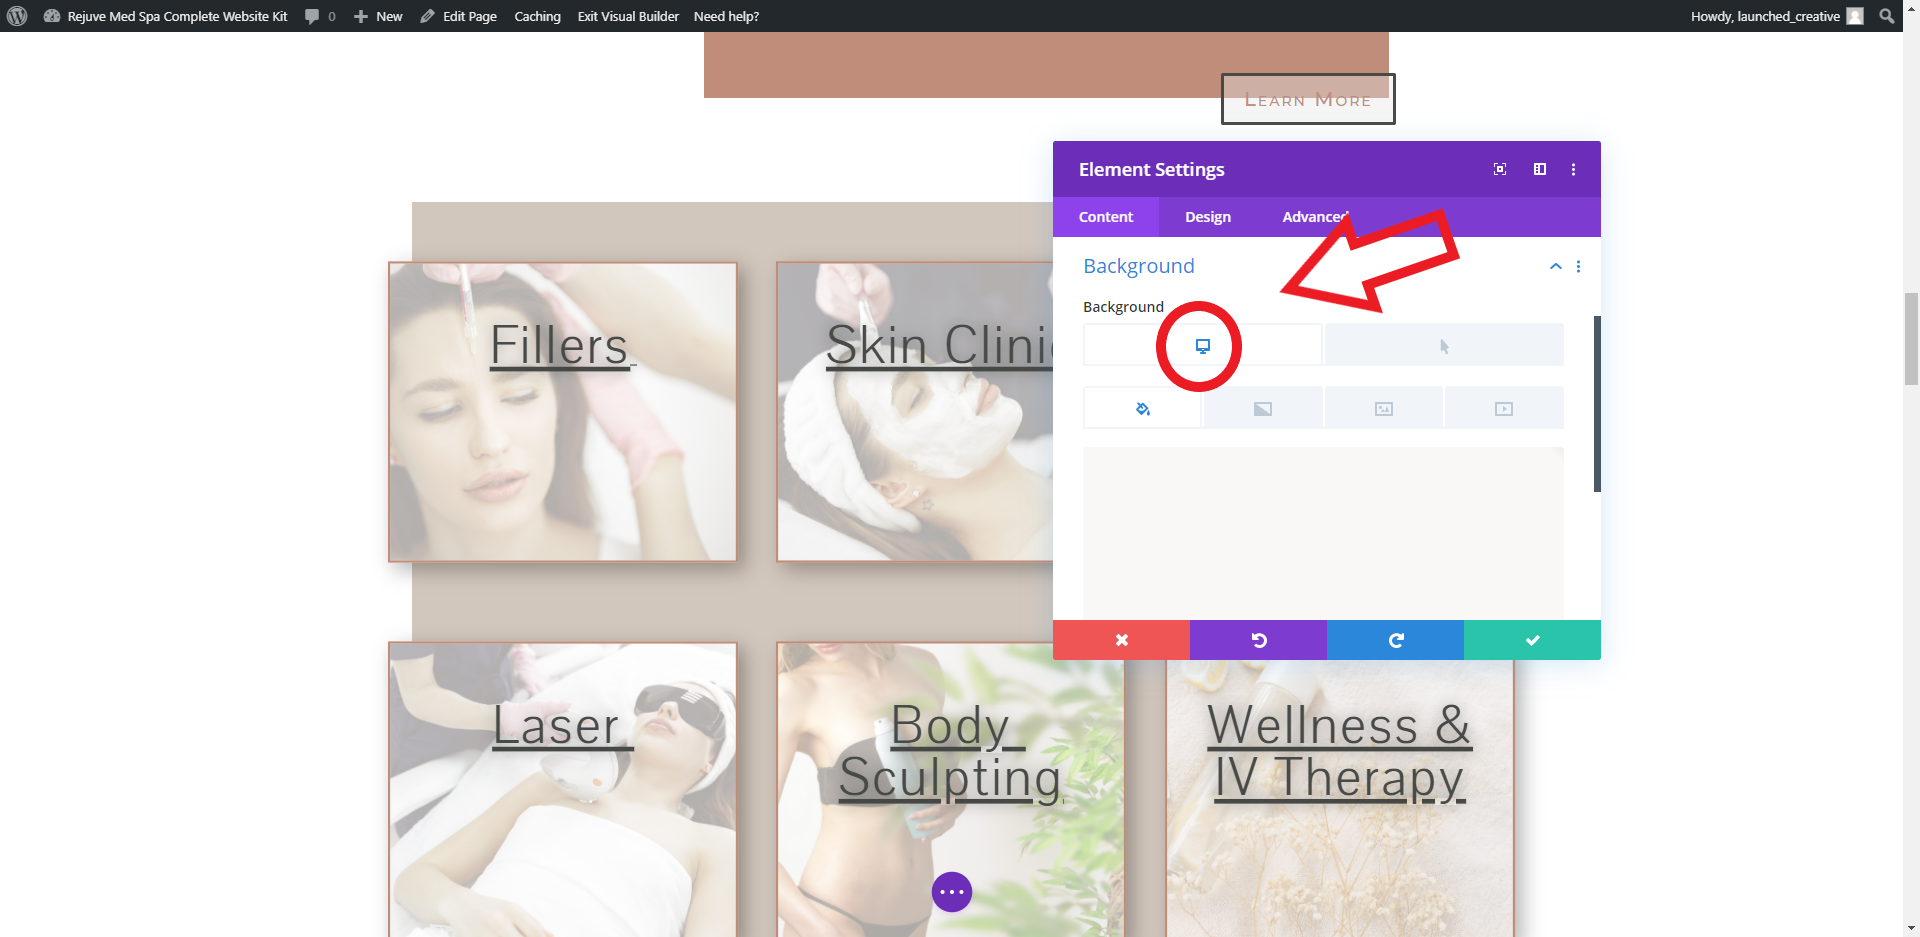
Hover View To Change Hover Background Color
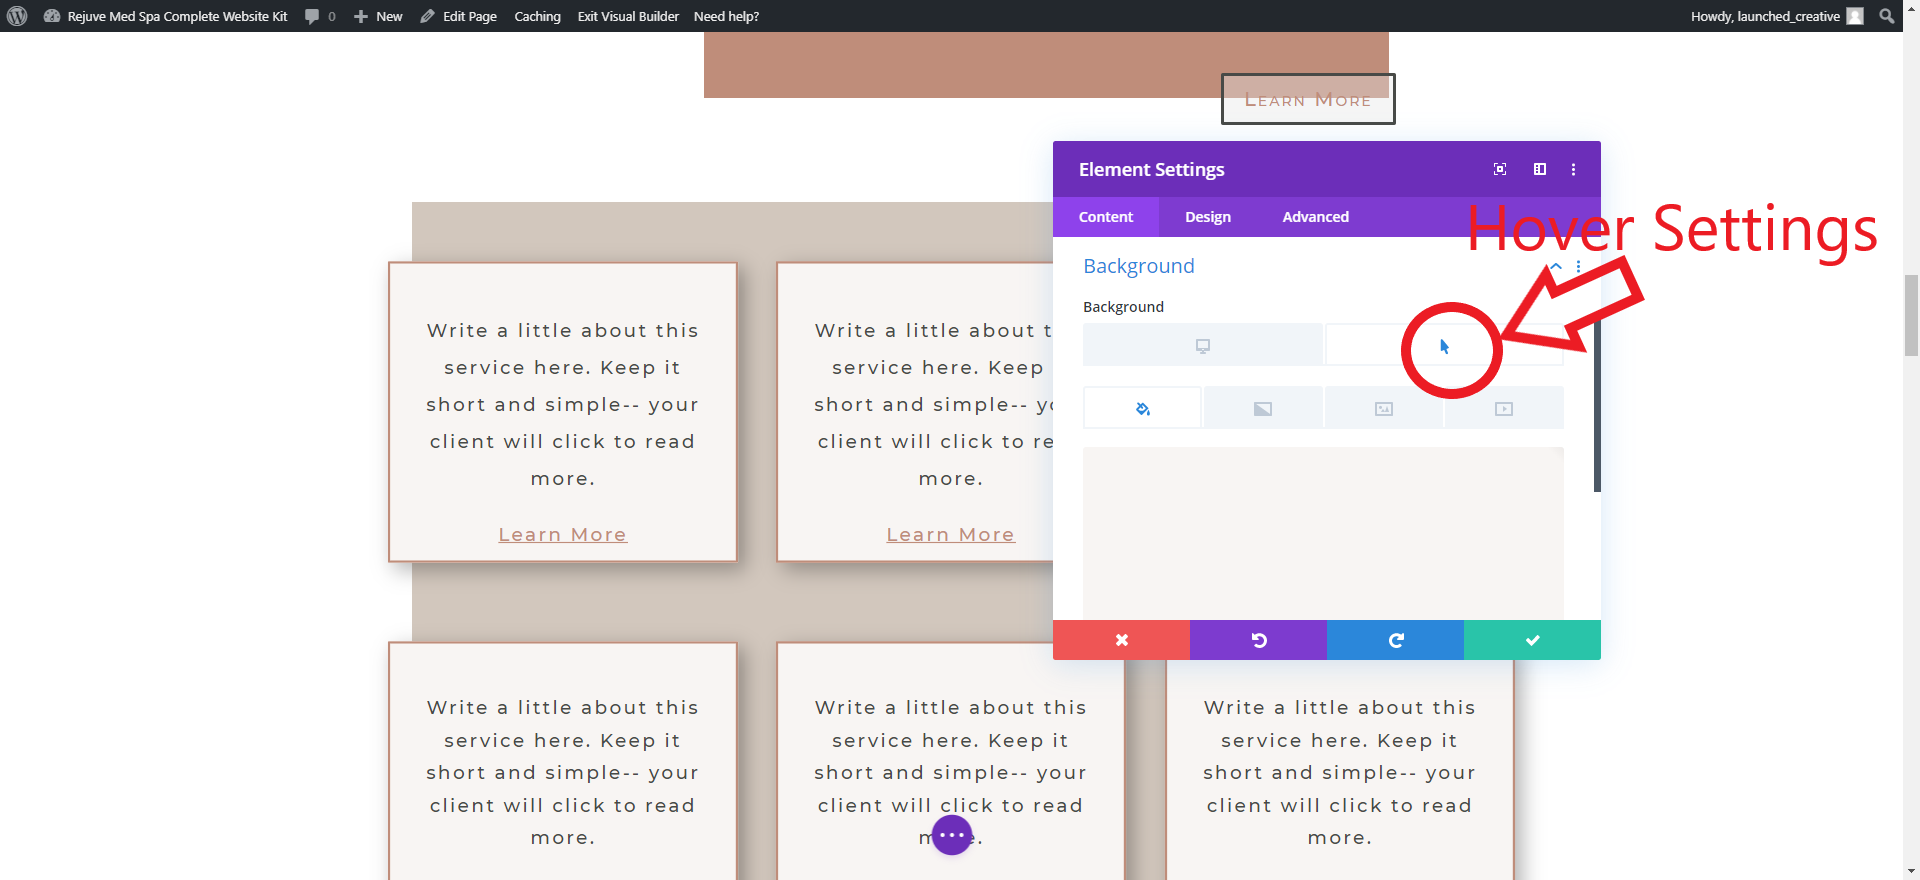
*Note: You can click the arrow in any module to adjust desktop/hover view and settings
*Note: You can click the arrow in any module to adjust desktop/hover view and settings
- Once you’ve made changes to the styling, simply click save and to exit the multi-select mode, click anywhere outside the services boxes.
- You can now change each box content individually
3-2 To Change Content & Background Image of Each Box
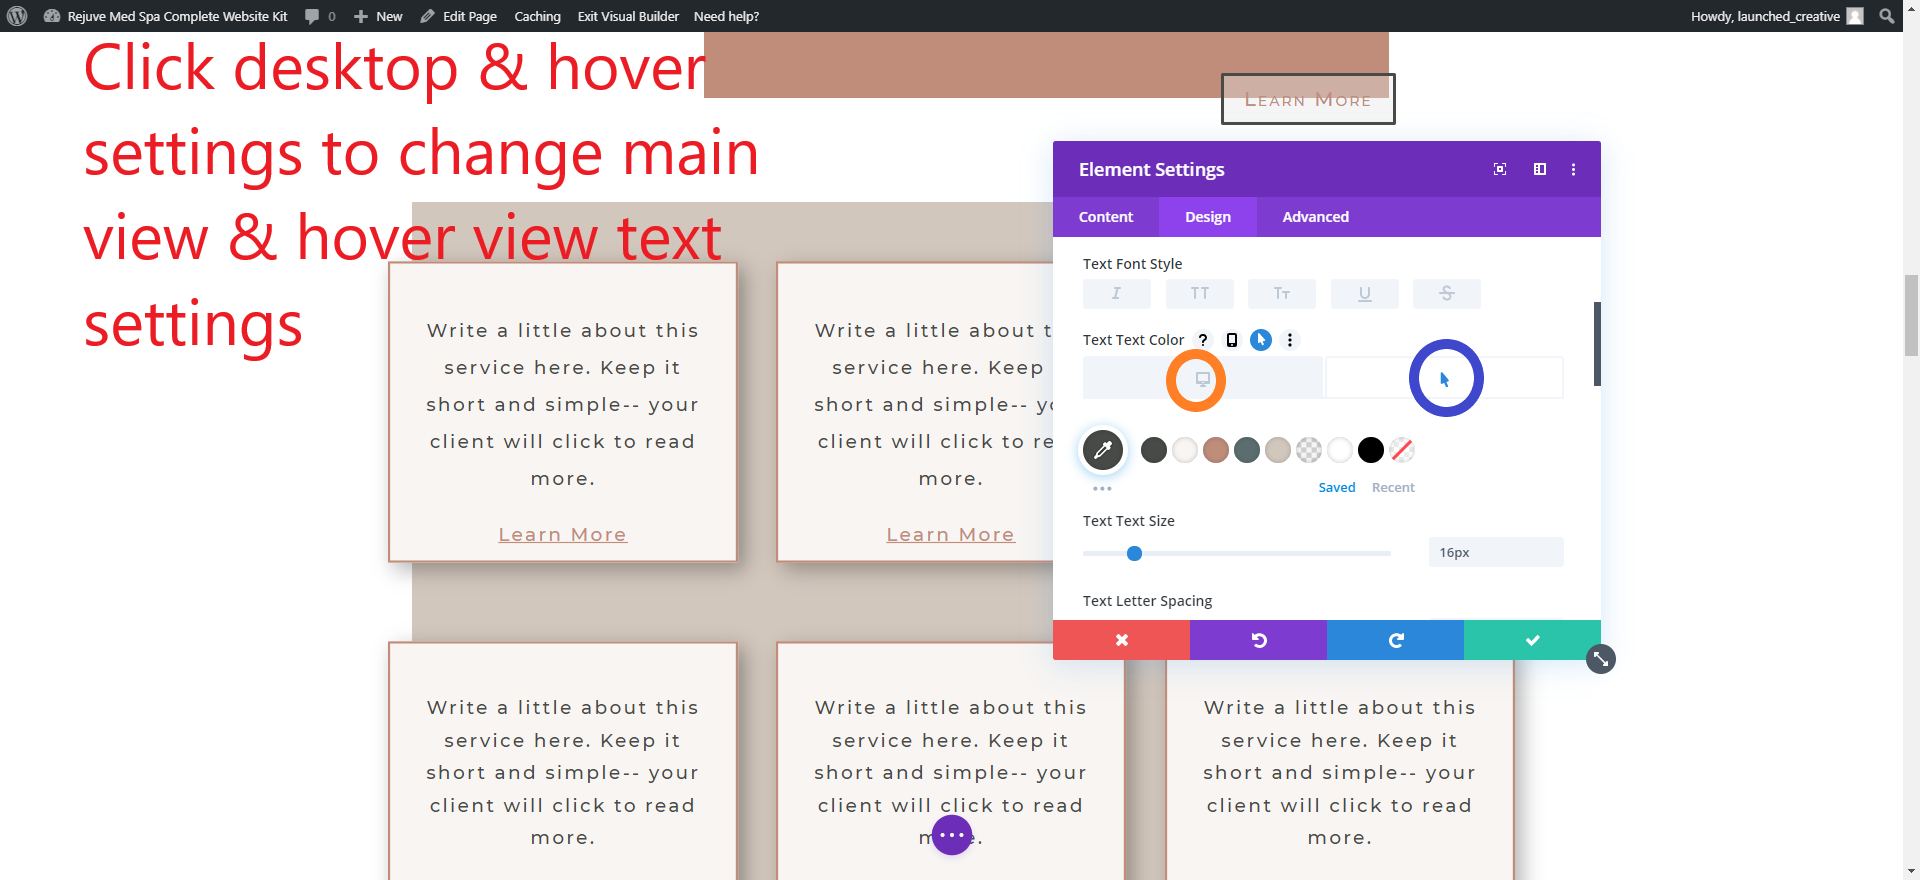
- Content: Click the grey gear settings icon > click the content tab > click the desktop icon to change Service Title

- Service Description (Hover): Click the hover arrow icon to change Service Description & Service Link
- Service Link: Highlight the “Learn More” Text, Click the hyperlink Button in the text editor box (above the body content) > add YOUR service page link and anchor link (if desired)
- Ex: /services
- Ex (anchor link): /services/#fillers

- Background Picture: While still in the content settings > scroll down to background > make sure you’re in the Desktop view mode, click on the image icon > upload desired image

Step 4- Changing Background Colors
4-1 To Change the background color of Sections:
- Click the blue section settings > Content Tab > background > input your desired background color.
4-2 To Change the background of Modules:
- Click the grey module settings > Content Tab > background > input your desired background color.
4-3 To change background color of rows:
- Click the green row settings > Content Tab > background > input your desired background color.
- To change a single column background color of a row:
- Click the green row settings > select desired column > Content Tab > background > input your desired background color.
Step 5- Testimonial Slider
5-1 To Change Slider Settings
- Click Grey Slider Module Settings Icon > click grey icon for “Client 1” > click “text” to input your customer name and testimonial text
- To change background color of testimonial box: In main slider settings area (where all testiminials are listed) > Click Design > click Overlay > input your color > click save
- This will apply color changes to ALL testimonial sliders. To change each individual slider to a different color overlay or text settings, follow the directions above in each slide.
5-2 To add Additional Testimonials
- While still in the Slider settings module above > click the copy button on the slide above and follow the steps in 5-1 to change to your content.
5-3 To change image next to slider
- Click the image settings button > replace with your image
5-3 To change Section color below testimonial slider
- Click the green row settings > column 1 > Content Tab > background > input your desired background color.
Step 6- Before/After Gallery
6-1 To Change Background Color:
- Click the green row settings > Content Tab > background > input your desired background color.
6-2 To Change Gallery Design:
- Click design tab to change fonts, colors, sizing and spacing
- Scroll down to image to change border color
- scroll down to Hover Icon Picker to select icon
6-3 To Update Images in Gallery
- Click the content tab of gallery module settings > Images > click + button to upload your images or select from your image library > click all images you’d like to add
- To delete existing images > hover over images in the Image area > click delete icon
Step 7- Mail Opt-In Module
7-1 To Add Your Mailing List Credentials
- Click the “Email Optin” Module Settings > Scroll down to Email Account > Select your service provider from drop down list > Add your account name > add your account API (this will be found within your mailing list account) > click submit to load.
- Click “Success Actions” to set what you’d like your successful list opt-in to say
- To Change the background colors of the mail module: click the grey gear icon > content settings > background > color
- To change button style: Click “Design” tab and scroll to “button” to change button color and font
7-2 To Change the background colors of entire the section:
- Click the blue section settings > background > color