Customize Your Website Menu To Fit Your Business
Follow along to see how to make these changes in the easy steps below.
To Get Started Making Menu Changes:
Navigate To Your WordPress Dashboard > Appearance> Click Menus
You are now in the Menus area of your WordPress Website.
Video Tutorials
Effective 1/25/21: One Click Installation made available for Transcend Kit. Menu from Demo site will be automatically added to your website with Kit installation. You can follow the instructions below to modify the menu loaded onto your website or to create a new menu.
Step 1- Setting Up Your Menu
1-1 Creating Your Menu
- Once in your Menu area of your website, you will be promoted to give your menu a name > name your Menu (e.g. “main menu”) > click “create menu”
1-2 Adding To Your Menu
- In the left hand column of the menu page > add menu items > click “view all” > check each page you would like to add to your menu that you have customized and published
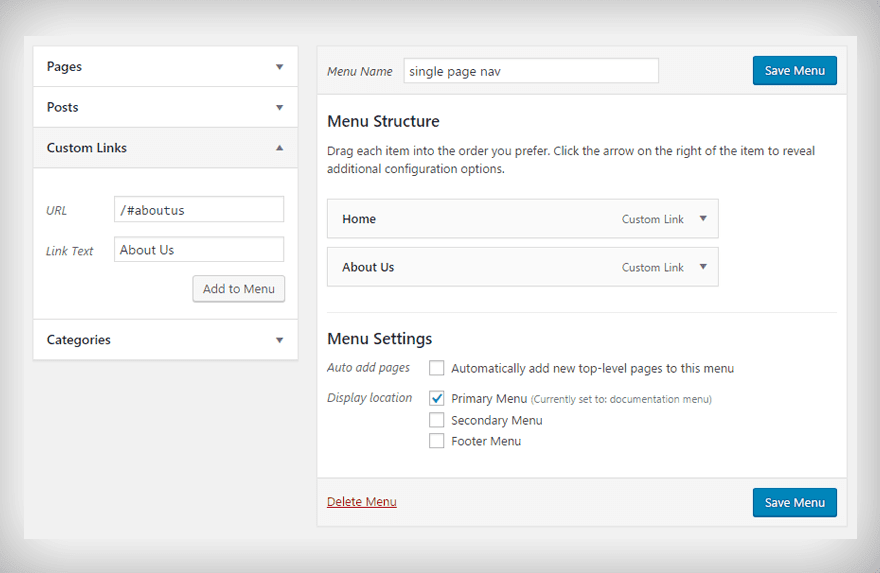
- To add custom links (like for FAQ section), in the left hand column, click “custom links” > type in URL (e.g. https://yourwebsite.com/services/#faq) to add the FAQ section to your menu > Link Text: FAQ
- Be sure to input YOUR website hyperlink in place of “yourwebsite.com
1-3 Setting Menu As Main Menu
- Scroll down to “Menu Settings” > click “primary menu” checkbox > click “save menu”
Step 2- Setting Up Blog Page Menu
2-1 Creating Your Menu
- Once in your Menu area of your website, you will be promoted to give your menu a name > name your Menu (e.g. “blog menu”) > click “create menu”
2-2 Adding To Your Blog Menu
- In the left hand column of the menu page > add menu items > click “Categories” then select “view all” > check each Category you would like to add to your menu bar on your blog page.
The Technical Stuff
Learn how to set up your Nagivation Menu structure (the Menus found in your Header- top of website, Footer- bottom of website, and any other Menus you want to set up).
Also learn about Anchor Links, which create links for your visitor to land exactly where you want them to on your website page.
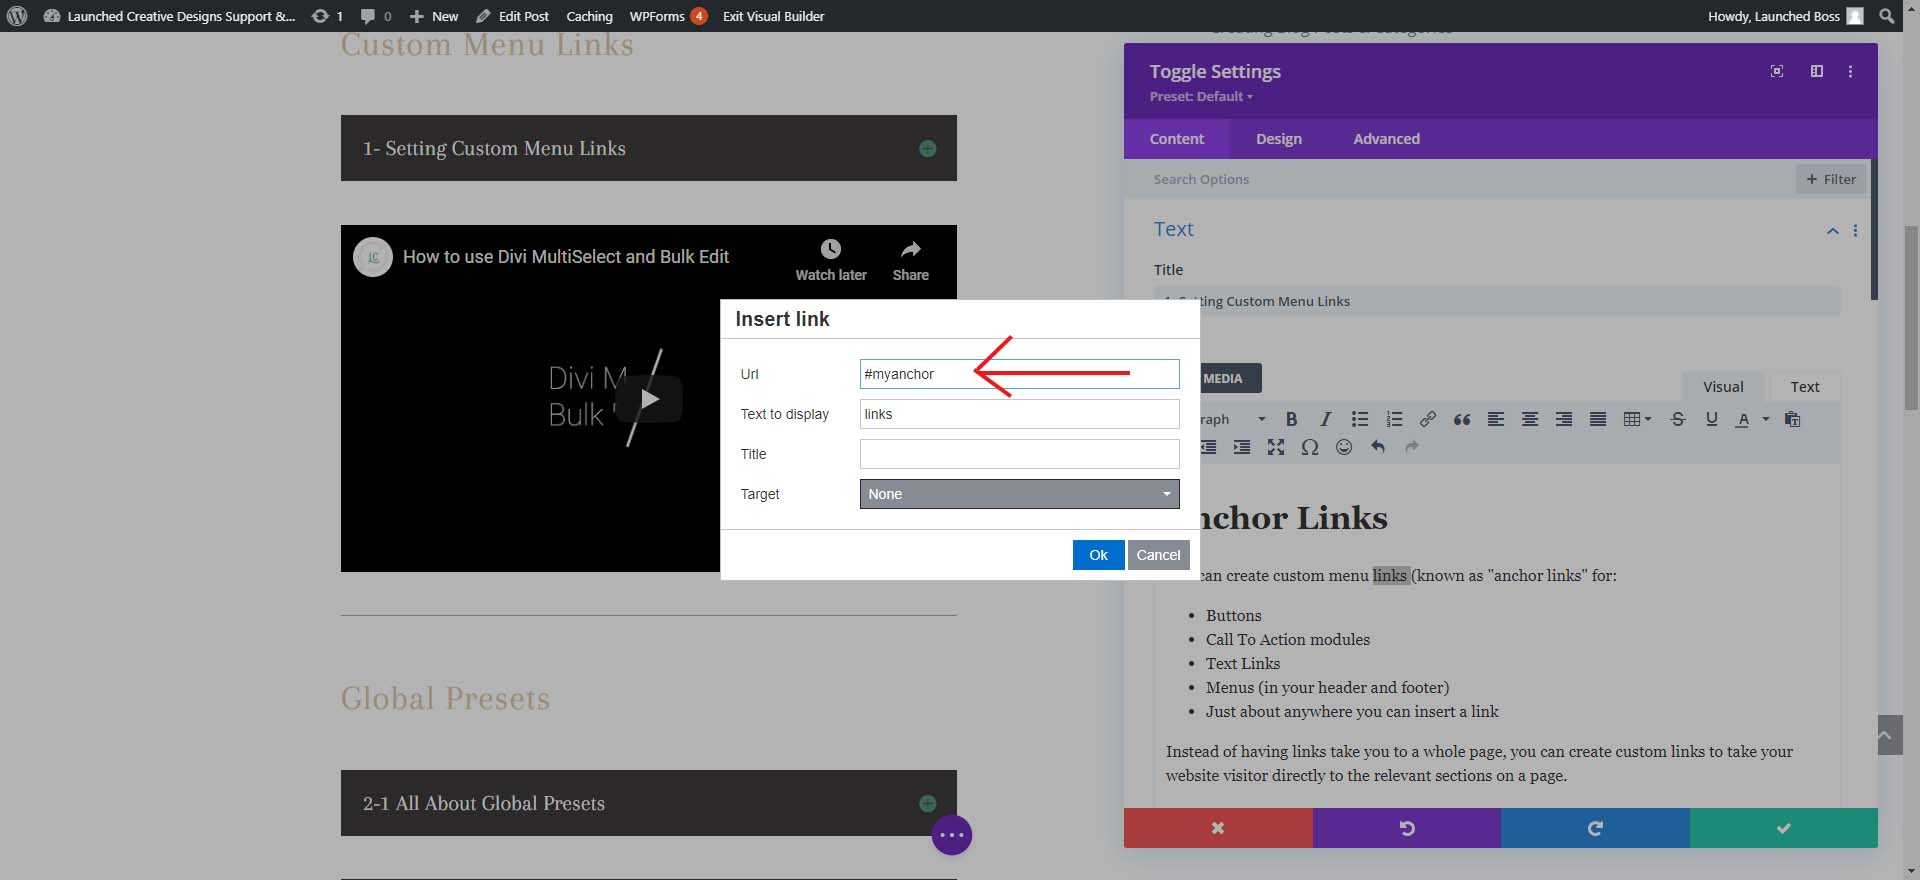
Custom Menu Anchor Links
1- Setting Custom Menu Links
Anchor Links
You can create custom menu links (known as “anchor links”) for:
- Buttons
- Call To Action modules
- Text Links
- Menus (in your header and footer)
- Just about anywhere you can insert a link
Instead of having links take you to a whole page, you can create custom links to take your website visitor directly to the relevant sections on a page.
When clicked, these custom links can take you to the relevant section on the same page using a smooth scrolling effect or drop down exactly where you want your visitor to land on a new page.
This can be accomplished using custom ID’s in your modules or elements. Any element on the page that is built with the builder can be assigned an ID.
How to set a custom ID to create a custom menu link:
To assign an ID to a section, row, or module, simply:
- click on the section, row, or module settings icon
- Click the “advanced” tab
- Click the “CSS ID & Classes” setting
- In the “CSS ID” field, write a simple, one word identifier to set the ID

Once an ID has been assigned, you can then link to it from the navigation menu or use the anchor within any module (buttons, text links, CTA, etc.) by using the anchor with a # sign in front.
For example, let’s say you have a section called “About Us” and you want it to link to the part of your page that describes your company.
- Edit the section that contains your About Us content
- Enter “aboutus” into the “CSS ID” field
- click “Save”
Now that an ID has been assigned, we can point a link to it like this in any text module within your page: /home/#aboutus
Link Structure: /page/#anchorlink
Be sure to include the page the anchor link is found on!
Link Anchors look in Menu:
Link Anchors in any module (button, link, etc)

Link Anchors as a hyperlink within text: