You will learn to Install & Activate Divi Theme along with the installation instructions for getting your Transcend Website Kit (child theme) uploaded to your website.
Getting Started
Set up your hosting & domain, purchase Divi & get your Divi license, Install Divi Theme
Step 1: Hosting & Divi License
To get started with a Website Kit, you need to have:
1- Self-Hosted WordPress
2- A Divi Theme License
Need Step-By Step help setting up Hosting/Domain with Bluehost?
BlueHost Hosting Setup Tutorial (contains affiliate links)
Need Divi Theme License?
Click here to purchase your own Divi Theme website license (affiliate link)
No idea what Divi Theme is and want to learn more?
Read my blog post “5 Reasons Why Divi Theme Is The Ultimate Tool For Beginners and Pros”
Step 2: One Click Website Installation
Effortlessly install your new website in just a matter of minutes! Once installed, your complete website kit will look and function exactly like the demo site of the website kit you purchased.
After installation is complete, I will walk you through how to customize every element of your website kit to make it uniquely yours.
2-1 Install Plugin
In your WordPress Dashboard, navigate to > left grey sidebar > click “Plugins” > once you are on the Plugins page, click the “Add New” button at the top of the Plugins Page
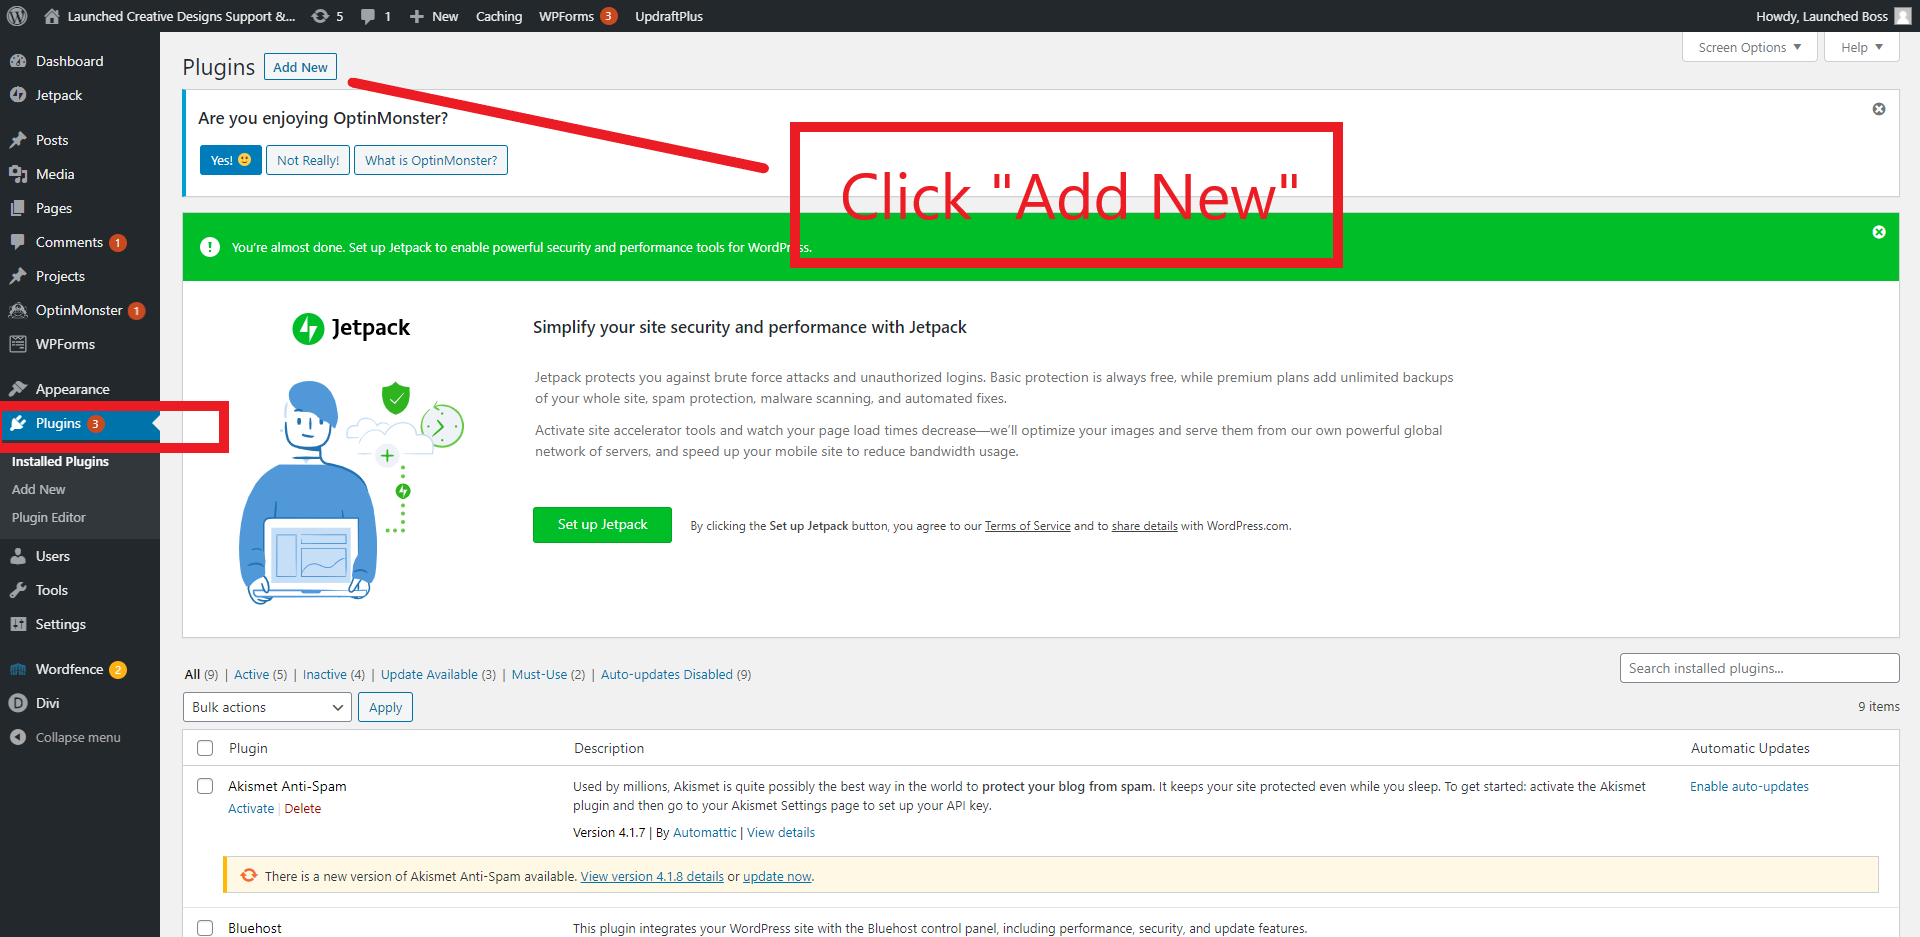
Next, Click “Upload Plugin”

Then click “Choose File”. Locate the zip file you downloaded upon purchase from Launched Creative. (Please leave the file in .zip format for upload)

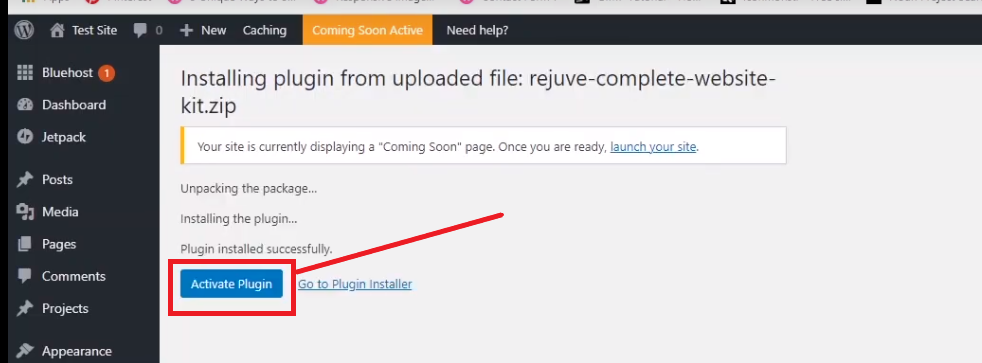
Once you’ve selected the zip file, click “Install Now”
Once Plugin is installed, click “Activate”
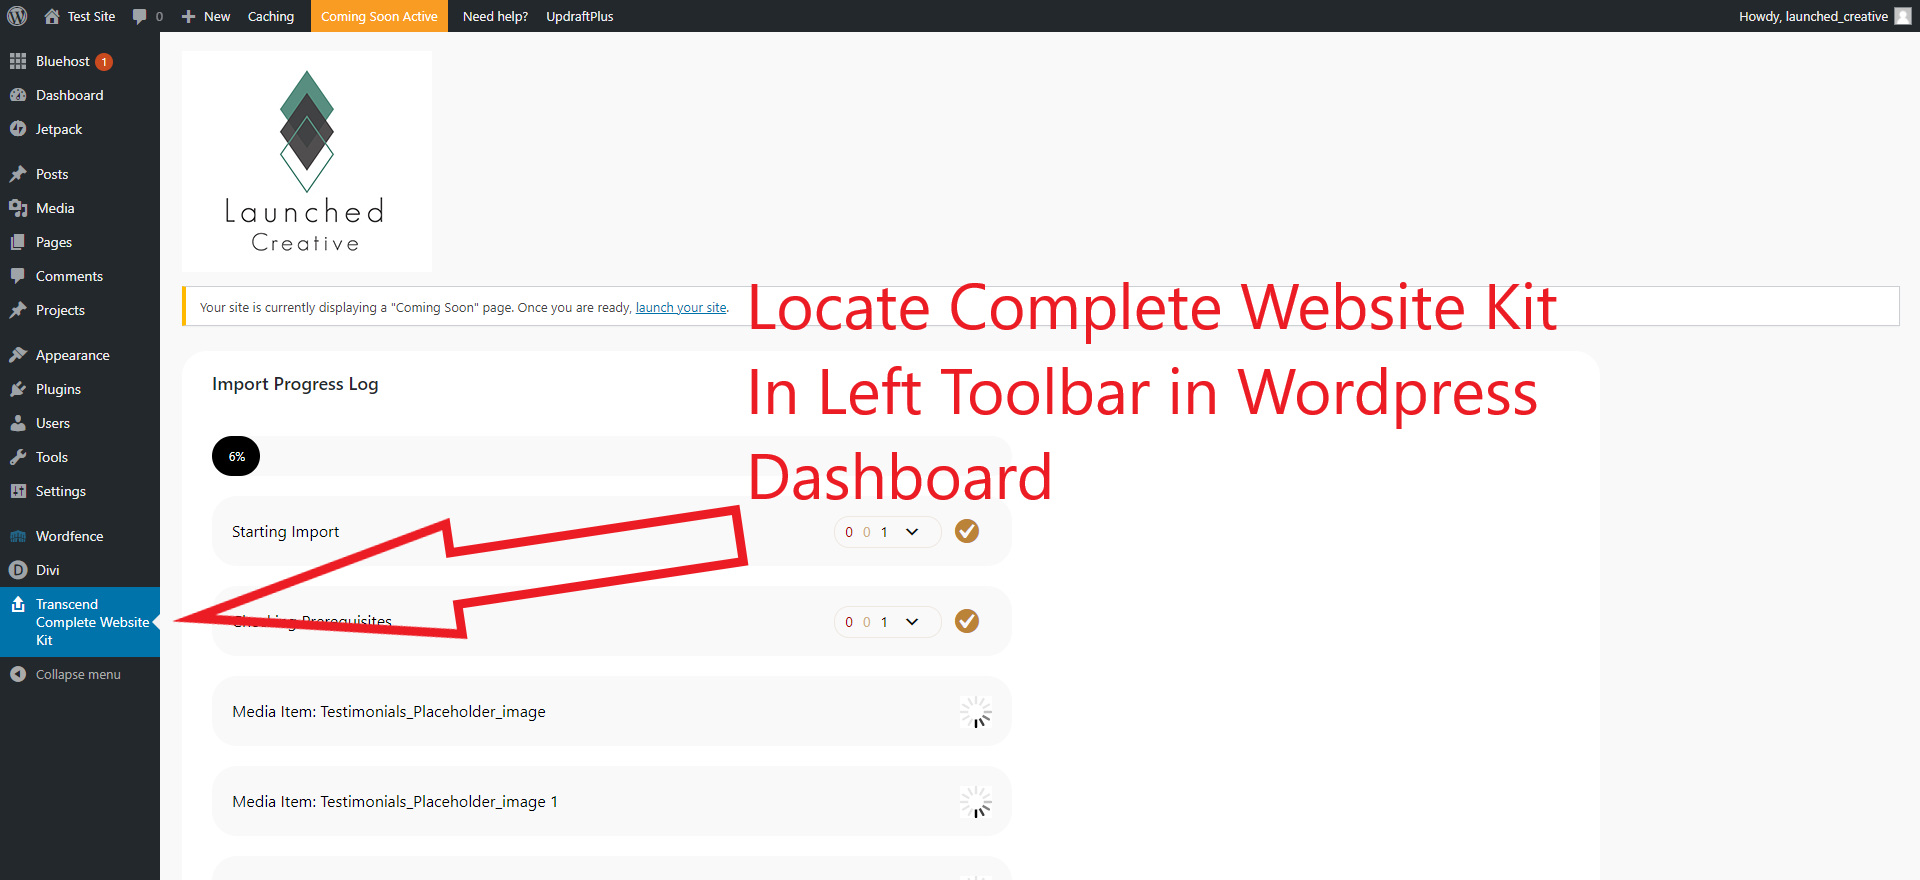
Locate the Complete Website Kit in the Left Toolbar of your WordPress Dashboard and click the kit to be taken to the import settings page.
Once in the Importer, choose the settings you would like for Import/Installation
*Note: Before importing the site, you have the option not to set the home page, menus or Theme Option and Customizer settings on an individual basis.
This may be useful if you wish to simply import pages and layouts without affecting how your current live site looks.
If you want your website to function exactly how the demo site functions right away, please do not de-select any import options.
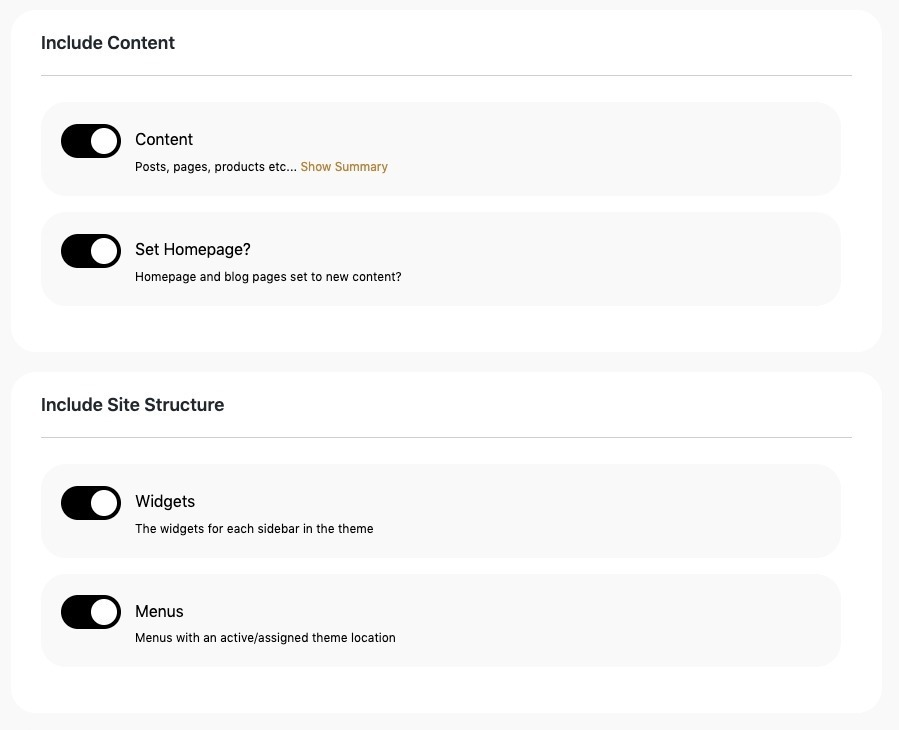
Once you’ve made all you import selections, click “Begin Site Import”

Once you hit the Import button, the Import Log will load, showing the progress of the import and confirming successful imports.
You Can Now Begin Customizing Your Website
Technical Stuff
Set Link Structure (permalinks)
Complete this action regardless of manual or one click installation
Video Walkthrough:
Setting Permalinks (the link structure of your website)
Step 3: Set Permalinks Structure (Your website links)
Updating Your Permalink Structure
This will update the way your links are structured for your website.
In the wordpress dashboard, scroll down to Settings > Permalinks
Choose whichever structure you want, we prefer “Post name” which gives your pages and posts a URL such as https://launchedcreative.com/kits instead of https://launchedcreative.com/?p=123
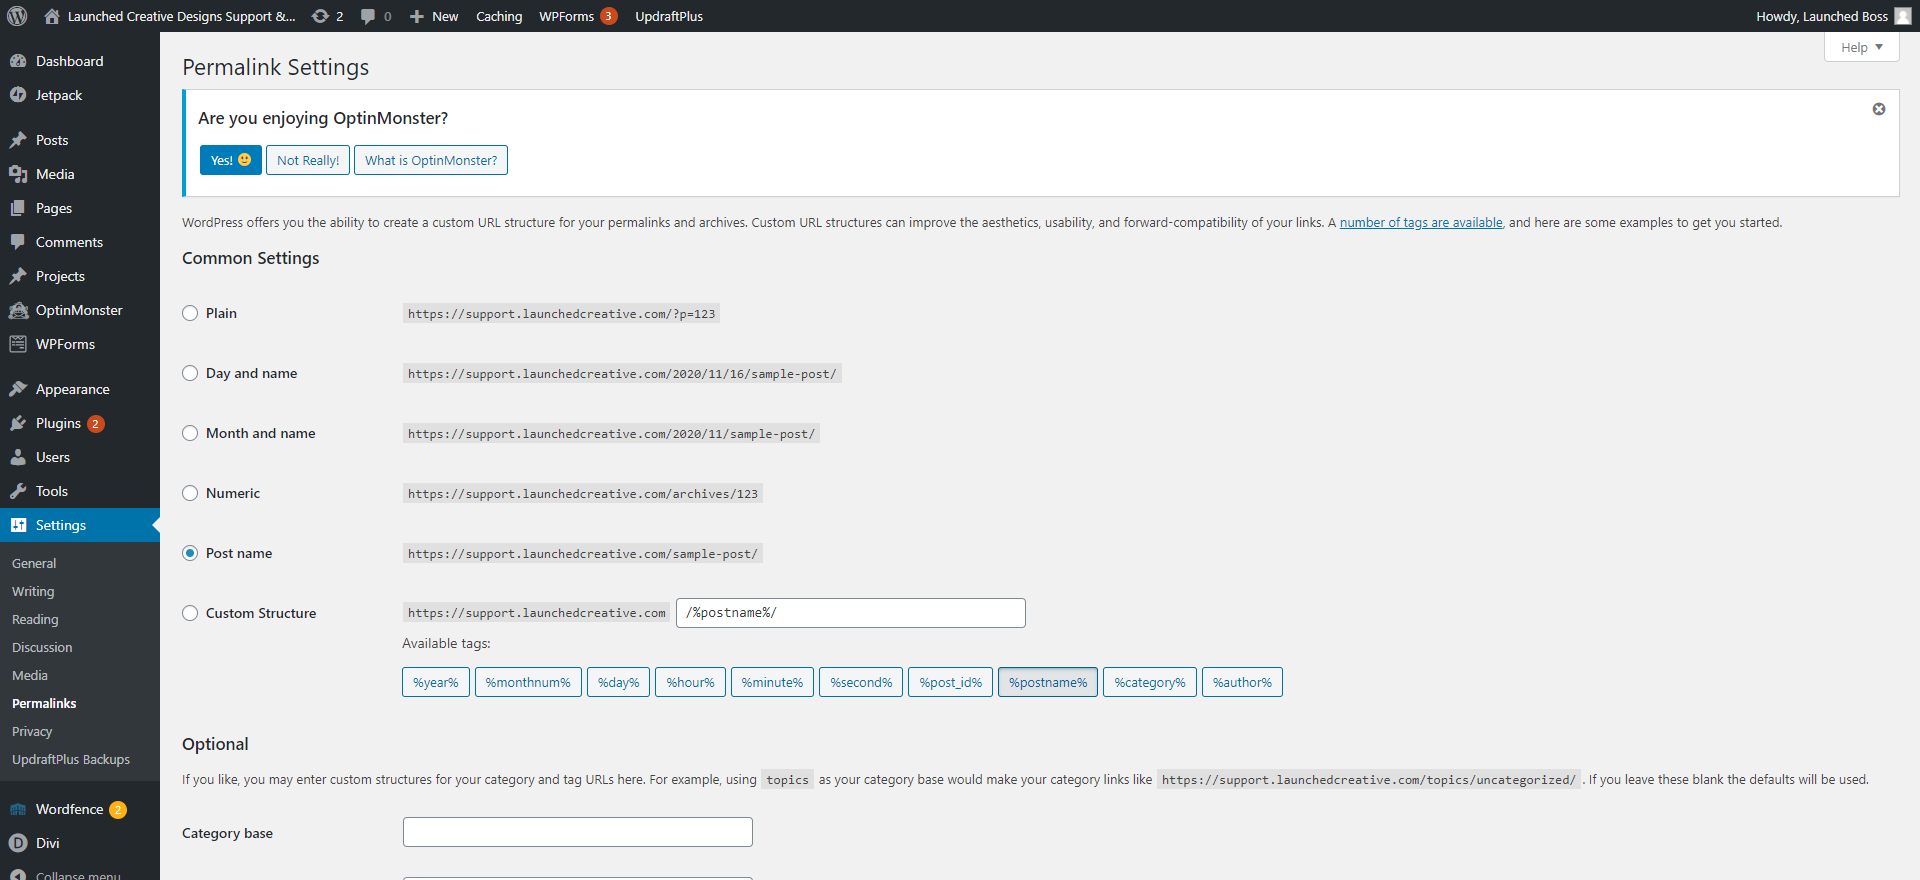
After you choose your permalink structure, click “Save Changes”.
Manual Installation (For customers who Purchased & Downloaded Spectrum Kit prior to 15 January 2021)
(Skip the following instructions if you used the one-click install above)
1- Manual Install: Install Divi Theme
2-1 Install the Divi Theme
Installing the Divi theme is simple! Watch the following video or read the steps below.
Find The File: Divi.Zip
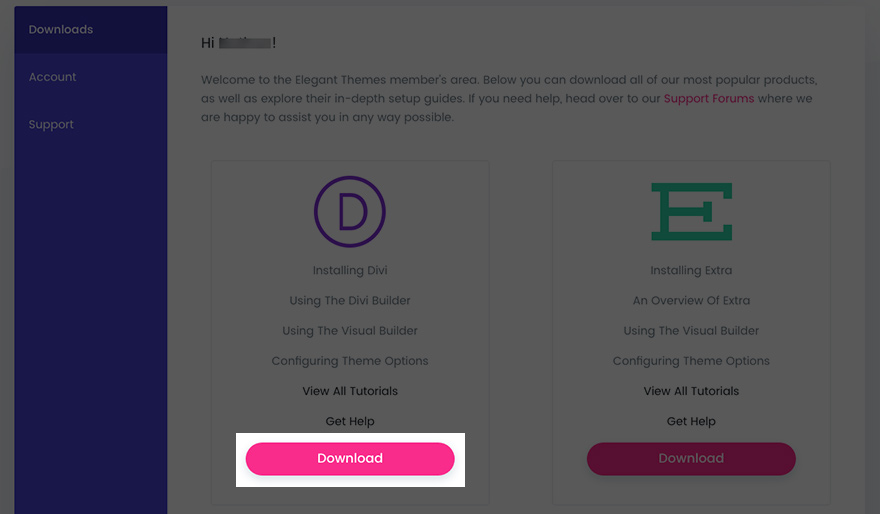
You will need to download the Divi.Zip file located in your Elegant Themes account dashboard to complete the next step.
If you have not yet downloaded your Divi.zip file, you’ll need to: Login to your Divi Account to retrieve it.
In your Elegant Themes dashboard, click, downloads and download under the Divi symbol. Don’t exit your account just yet, you’ll need it for the last step in this process.
Installing Divi Theme on Your WordPress
- Click over to your WordPress Dashboard > Appearance > Themes.
- Next, click “Add New”
- Click “Upload Theme”
- Choose the Divi .zip file and upload.
- Click “Activate”
Divi Theme is now installed!
2-2 Add your Username & API key to Divi to receive updates
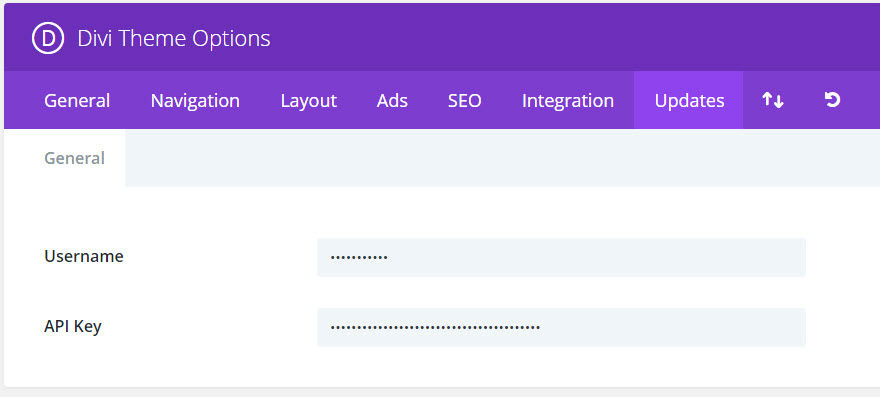
- In your WordPress Dashboard, scroll down to Divi and click > Theme Options
- Click the tab labeled “Updates”
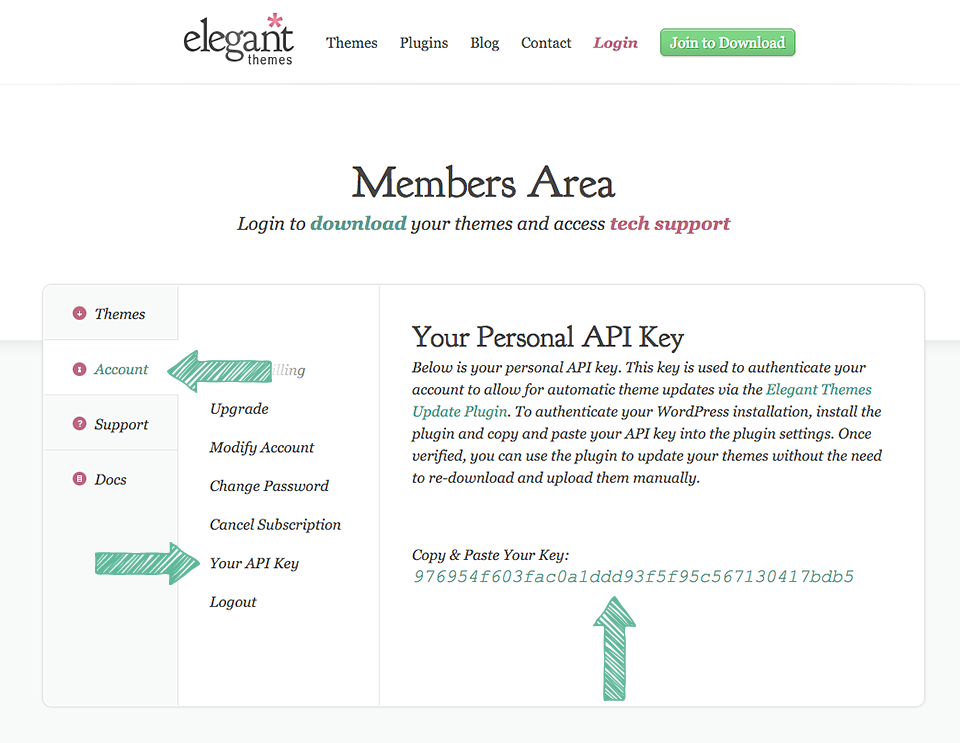
- Enter your elegant themes username
- Enter your API Key (found in your Elegant Themes account and pictured below)
- Click “Save Changes”
Your Divi Theme will now be able to accept updates as they come through.
2-Manual Install: Install "Spectrum" Child Theme
Install the Spectrum Divi Child Theme
Now that you have Divi Theme installed, can now upload the Spectrum Child Theme. (A child theme contains the pre-made styling and coding to the “parent theme” Divi. Parent themes come as a blank slate and the child theme contains what you need to make it look like the Transcend demo site)
You will follow the same process as installing and activating the Divi theme. Watch the following video or read the steps below for guidance.
Find The File: Spectrum.zip
For this step, you will need the Spectrum.Zip file located in the Spectrum Website Kit downloaded from the Launched Website after purchase. If you need to retrieve the file again, log in to your account dashboard on Launched Creative and download.
Video shown below is a general upload video. It does not show Spectrum Website Kit specifically.
Click over to your WordPress Dashboard and on left sidebar click > Appearance, then click > Themes.
- Click “Add New”
- Click “Upload Theme”
- Choose the Transcend-child.zip file and upload.
- Click “Activate”
Your Spectrum Child Theme is now installed and you are totally rocking this!
3-Manual Install: Import Custom Settings
Import Kit Settings, Page Templates, and Theme Build Settings
Now that your Child Theme is installed on your website, you will need to upload a few additional files to get you set up.
Find The Folder: Imports
In your Spectrum.zip file, there is a folder labeled “Imports”. You will need the files within that folder for the following steps.
Video depicts general upload and is not specific to Spectrum Theme. The instructions are the same, just ensure you select the Spectrum folder.
4-1 Import Spectrum Theme Options
Find The File: Divi Theme Options.json
Found in your Spectrum.Zip folder under “Imports”.
- In your WordPress Dashboard, scroll down to Divi and click > Theme Options
- Click the up and down (export/import) arrows on the right-hand side.
- Click “Import”.
- Upload “Divi Theme Options.json”
4-2 Import Spectrum Customizer Settings
Find The File: Divi Customizer Settings.json
Found in your Spectrum.Zip folder under “Imports”.
- In your WordPress Dashboad, scroll down to Divi and click > Theme Customizer
- Click the up and down (export/import) arrows on the left-hand side.
- Click “Import”.
- Upload “Divi Customizer Settings.json”
- Click “publish” and then click to exit the customizer once changes have been saved.
4-3 Import Theme Builder Templates
Find The File: Divi_Theme_Builder_Templates.json
Found in your Spectrum.Zip folder under “Imports”.
- In your WordPress Dashboad, scroll down and hover over Divi and click > Theme Builder
- Click the up and down (export/import) arrows on the right hand side
- Click “Import”.
- Upload “Divi_Theme_Builder_Templates.json”
- Click “Save Changes” once the templates have successfully uploaded to this page.
4-4 Import Divi Builder Layouts
Find The File: Divi Builder Layouts.json
Found in your Spectrum.Zip folder under “Imports”.
- In your WordPress Dashboad, scroll down to Divi and click > Library
- Click the Import/Export button on the top right hand corner of the page.
- Click “Import”.
- Upload “Divi Builder Layouts.json”
You can expect these files to take several minutes to load. If your screen goes blank and hangs for a while, you can click refresh. If your files have uploaded, they will show in your Divi Library.